How to two-way sync client Airtable bases

A step-by-step guide for setting up a "Master" base for your team and "Child" bases for clients.
- How to set up 2-way synced client Airtable bases
- 1. Setup you Airtable bases
- 2. Go to app.whalesync.com and create a new sync
- 3. Connect both your Airtable databases
- 4. Go to table mapping
- 5. After mapping all your table and fields, hit ‘Filter’
- 6. Add your filters
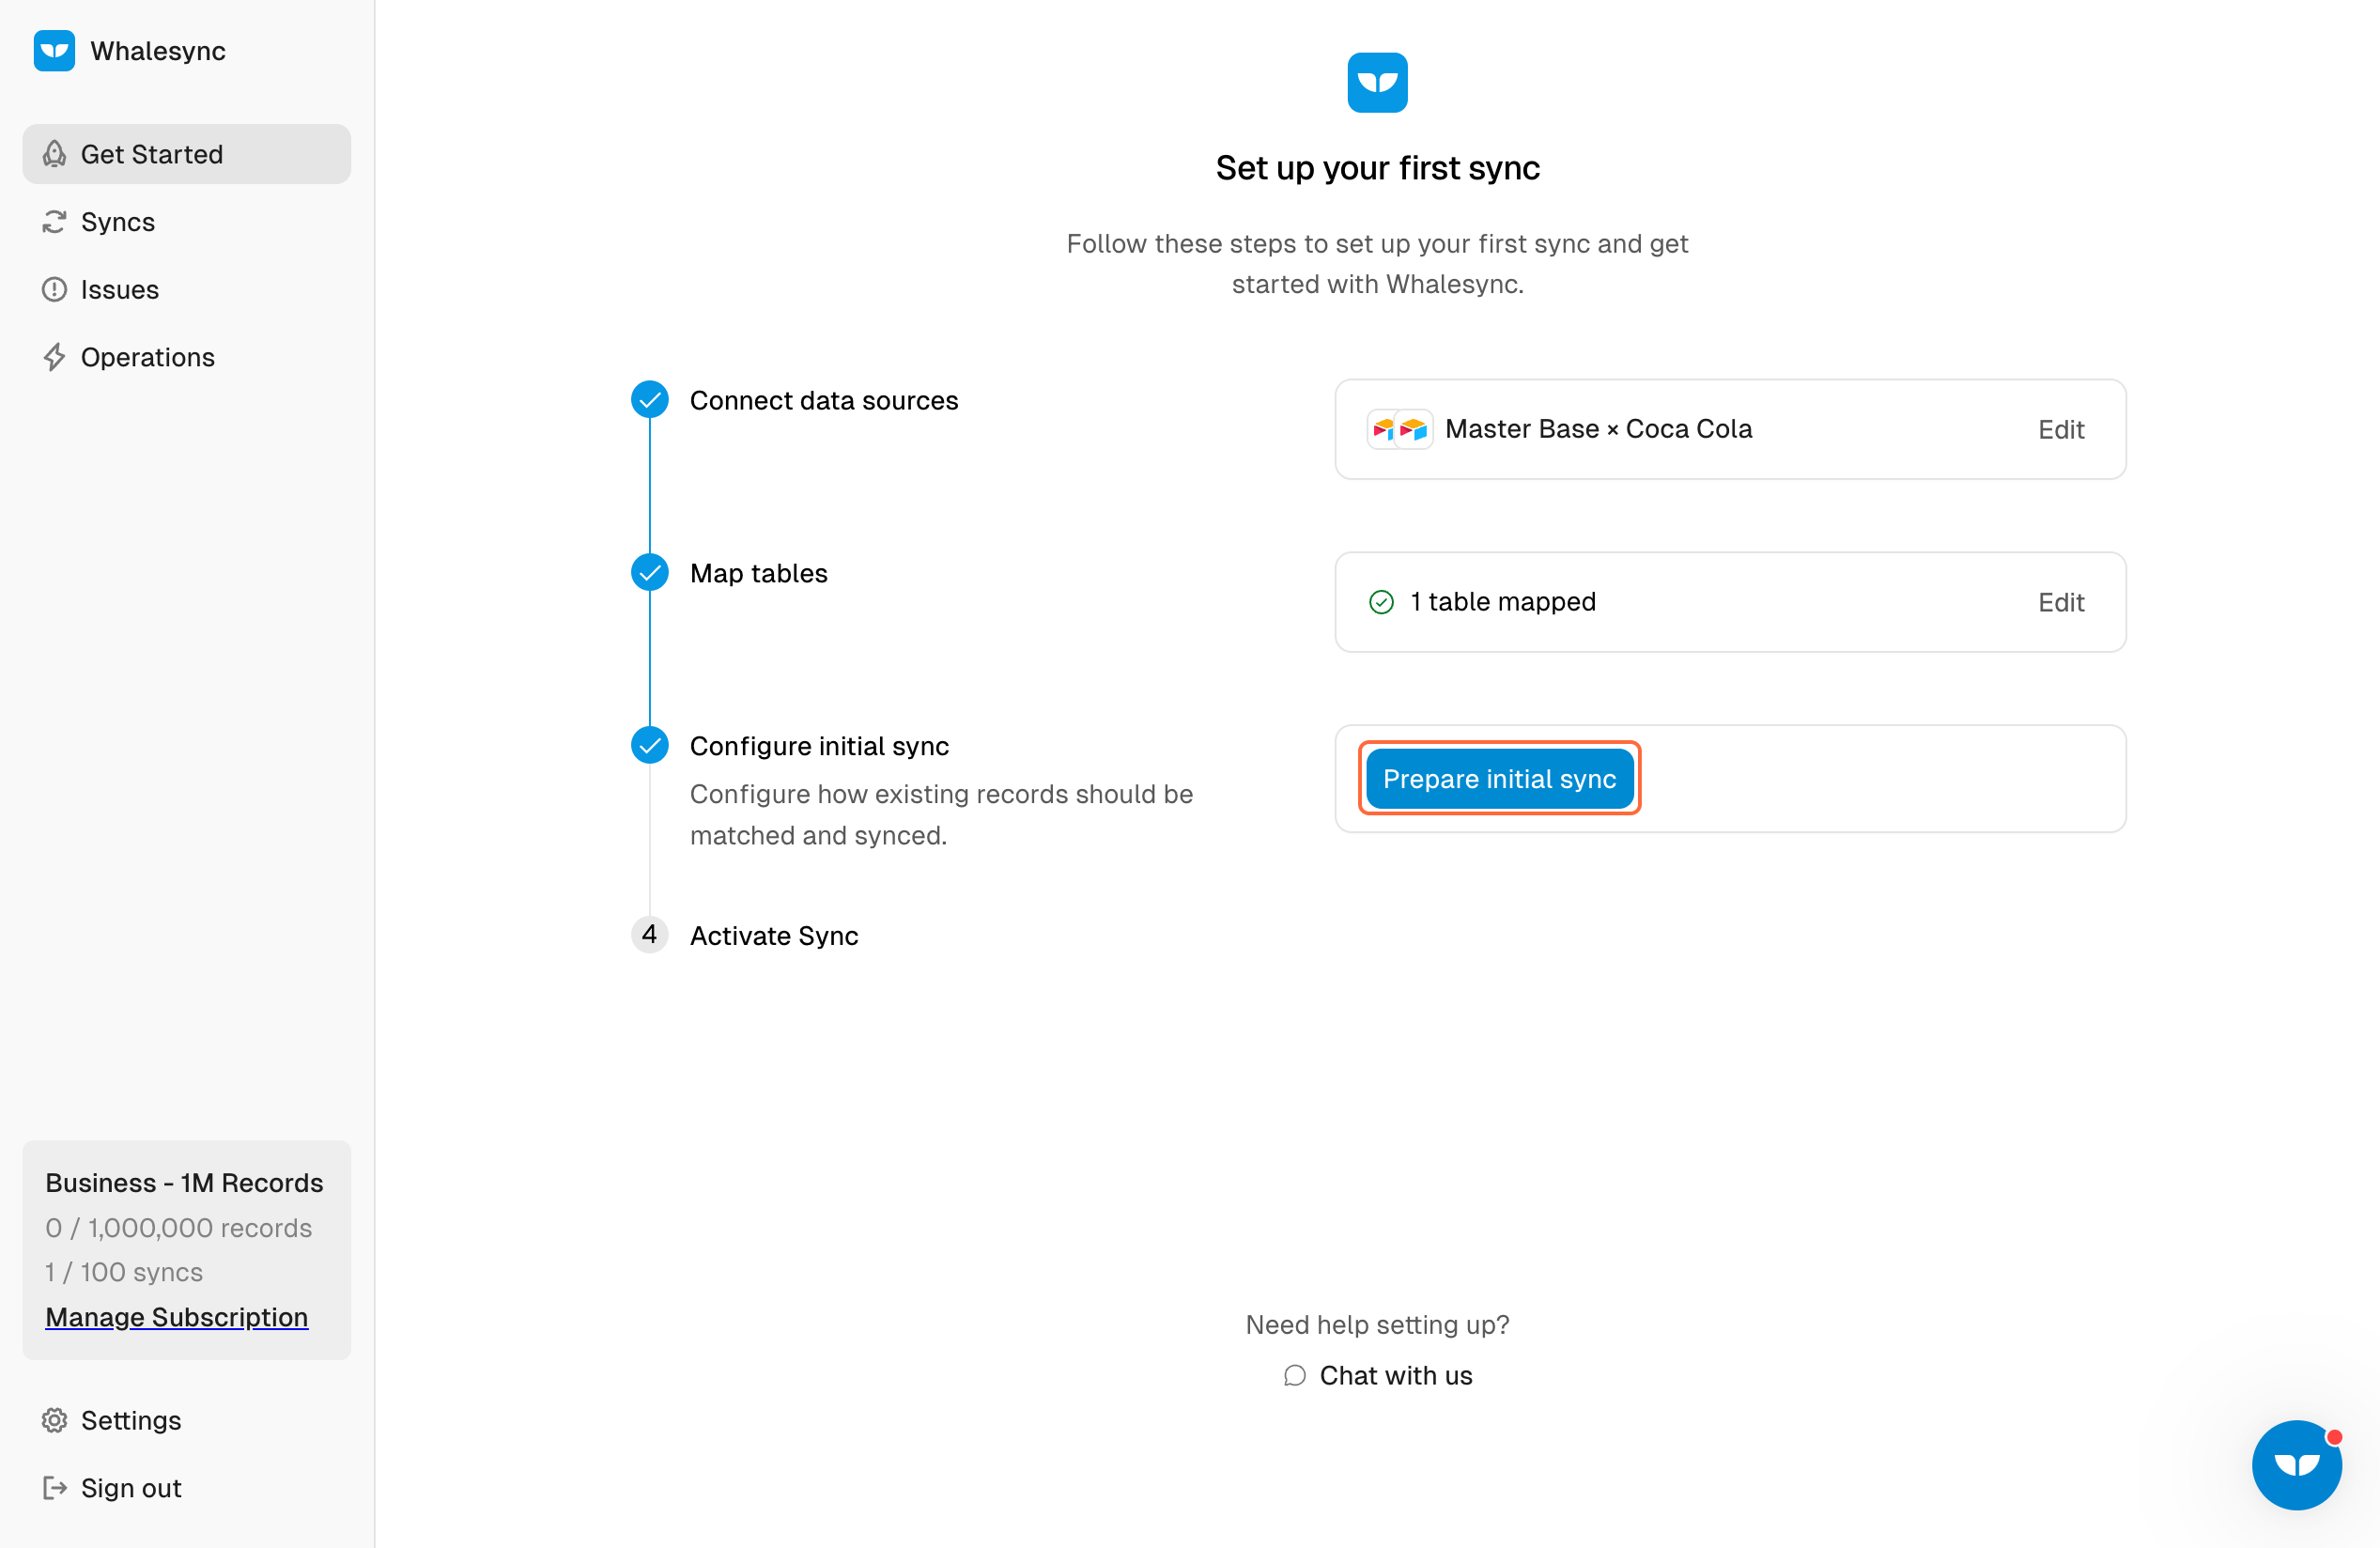
- 7. Go through the Initial Sync stage
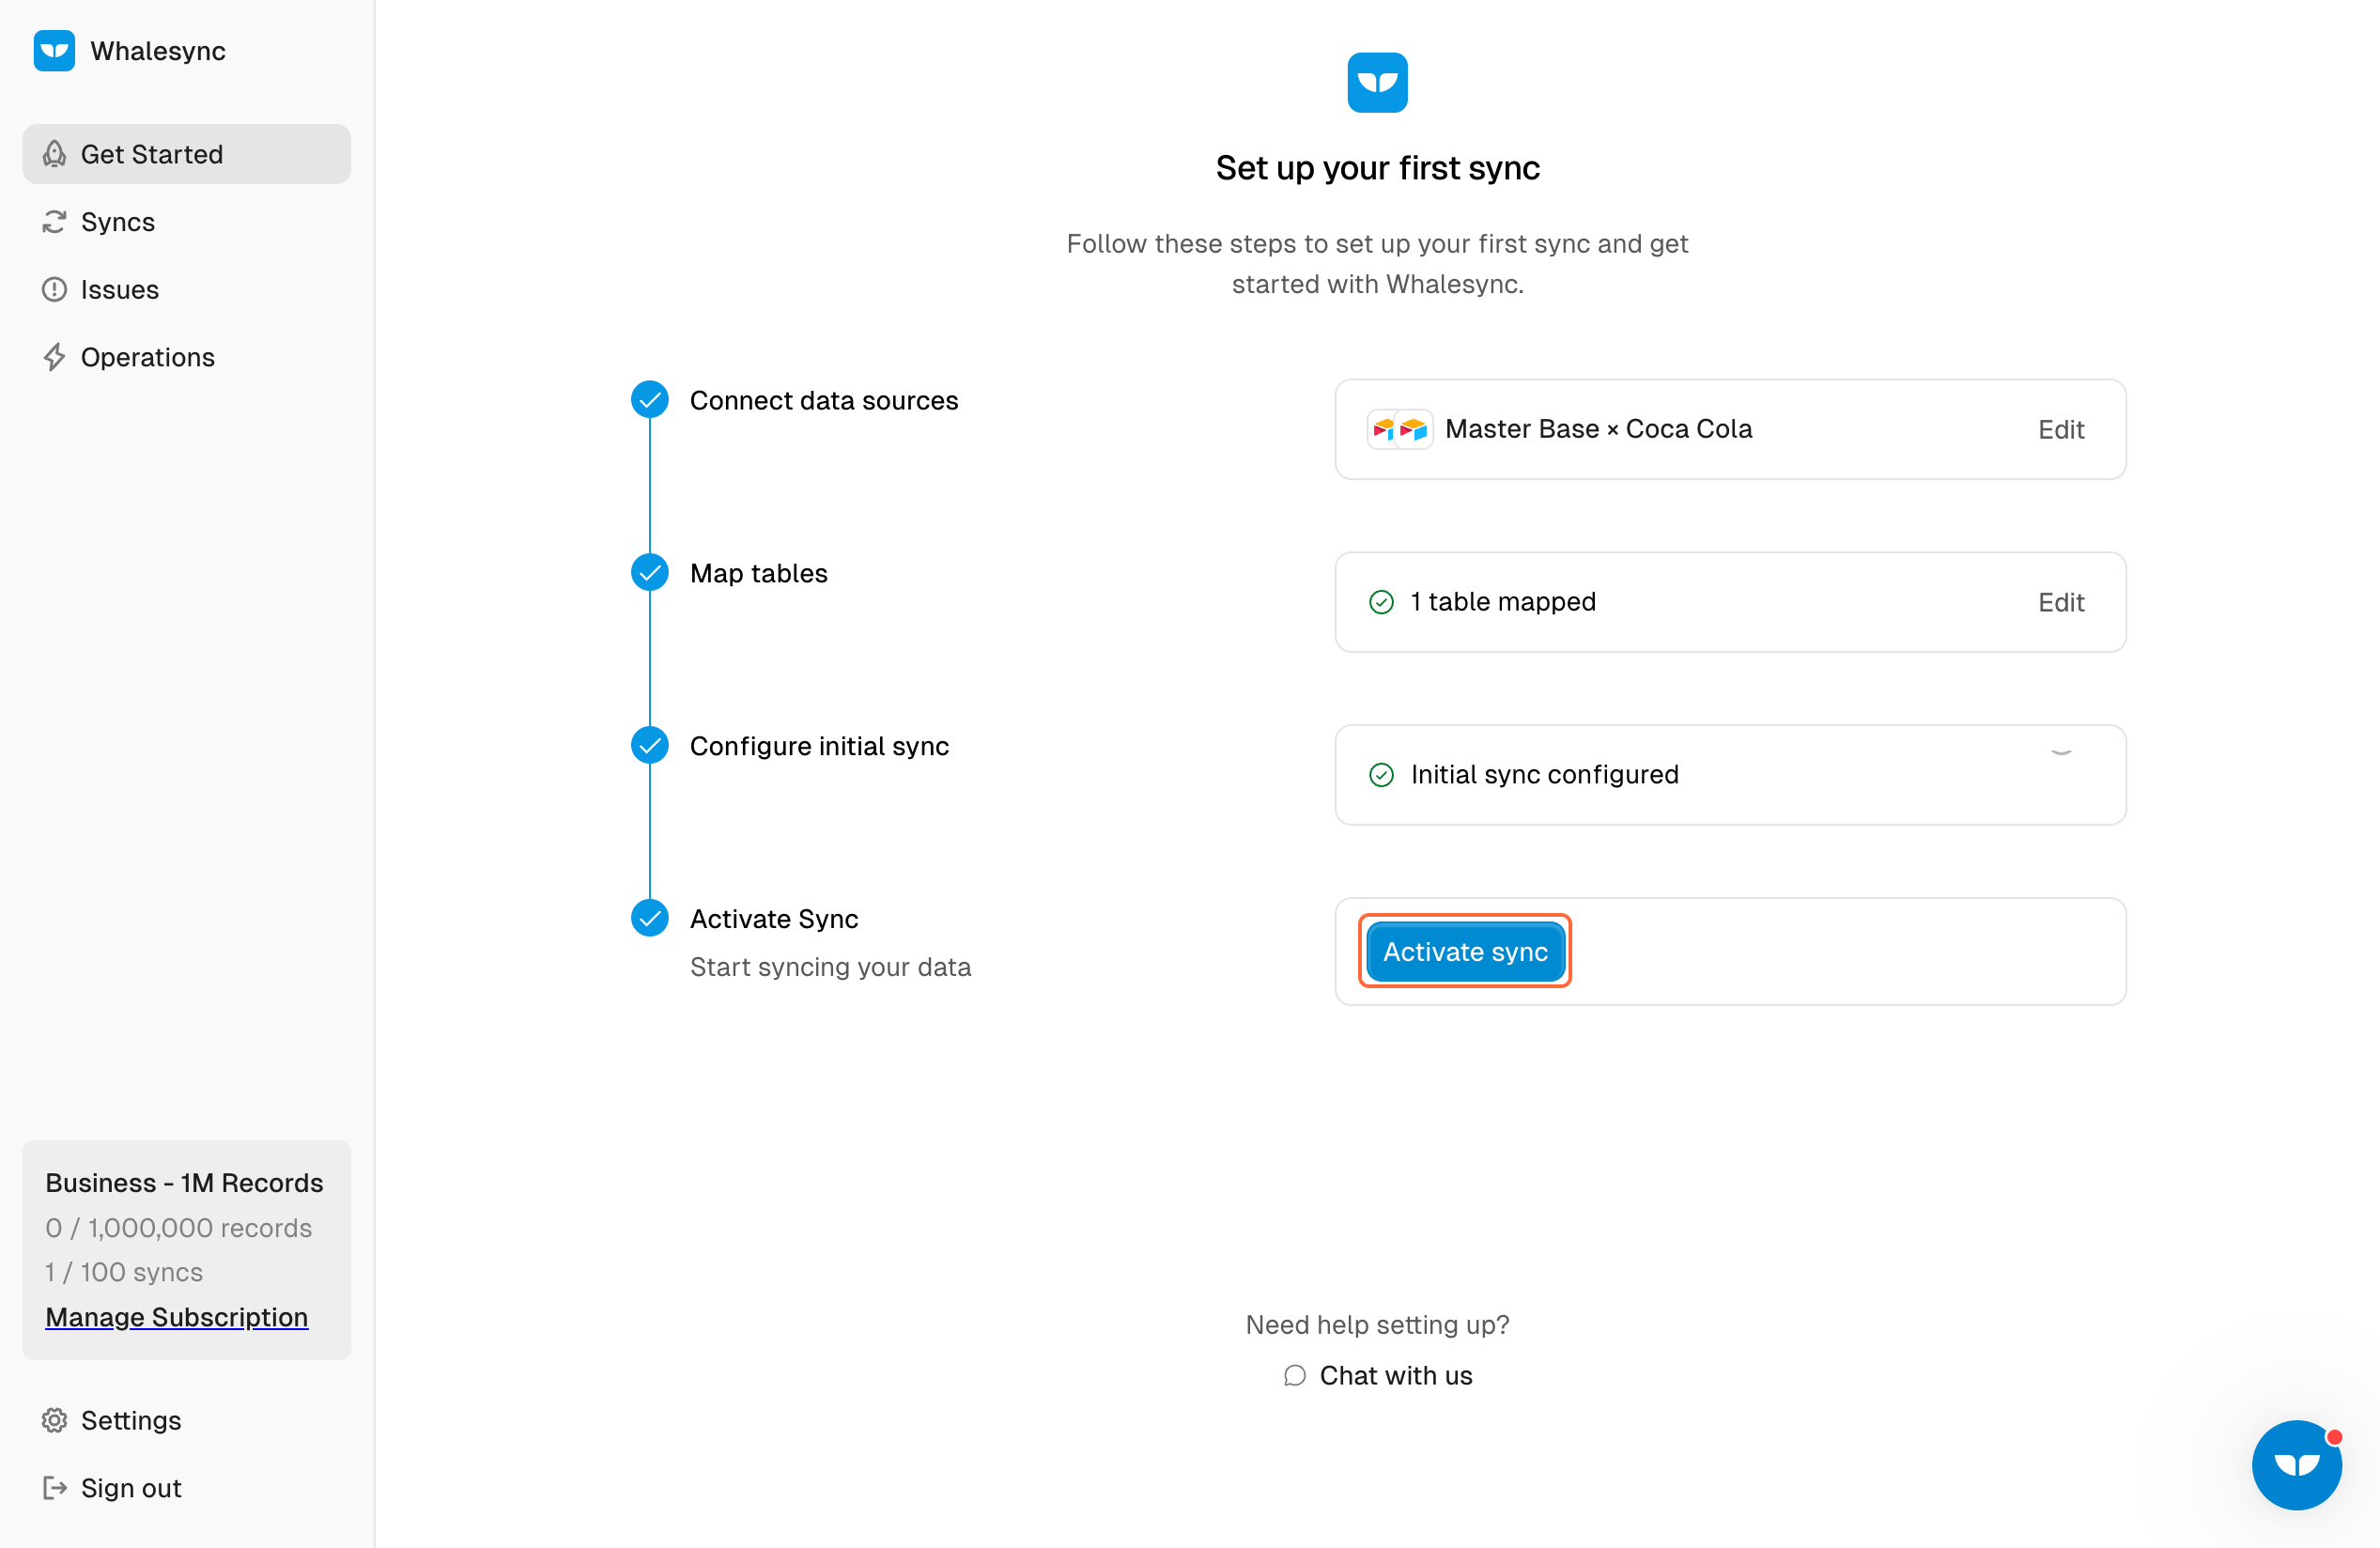
- 8. Activate your sync!
- You’re done! You now have a 2-way sync between your Airtable bases.
- Video Tutorial

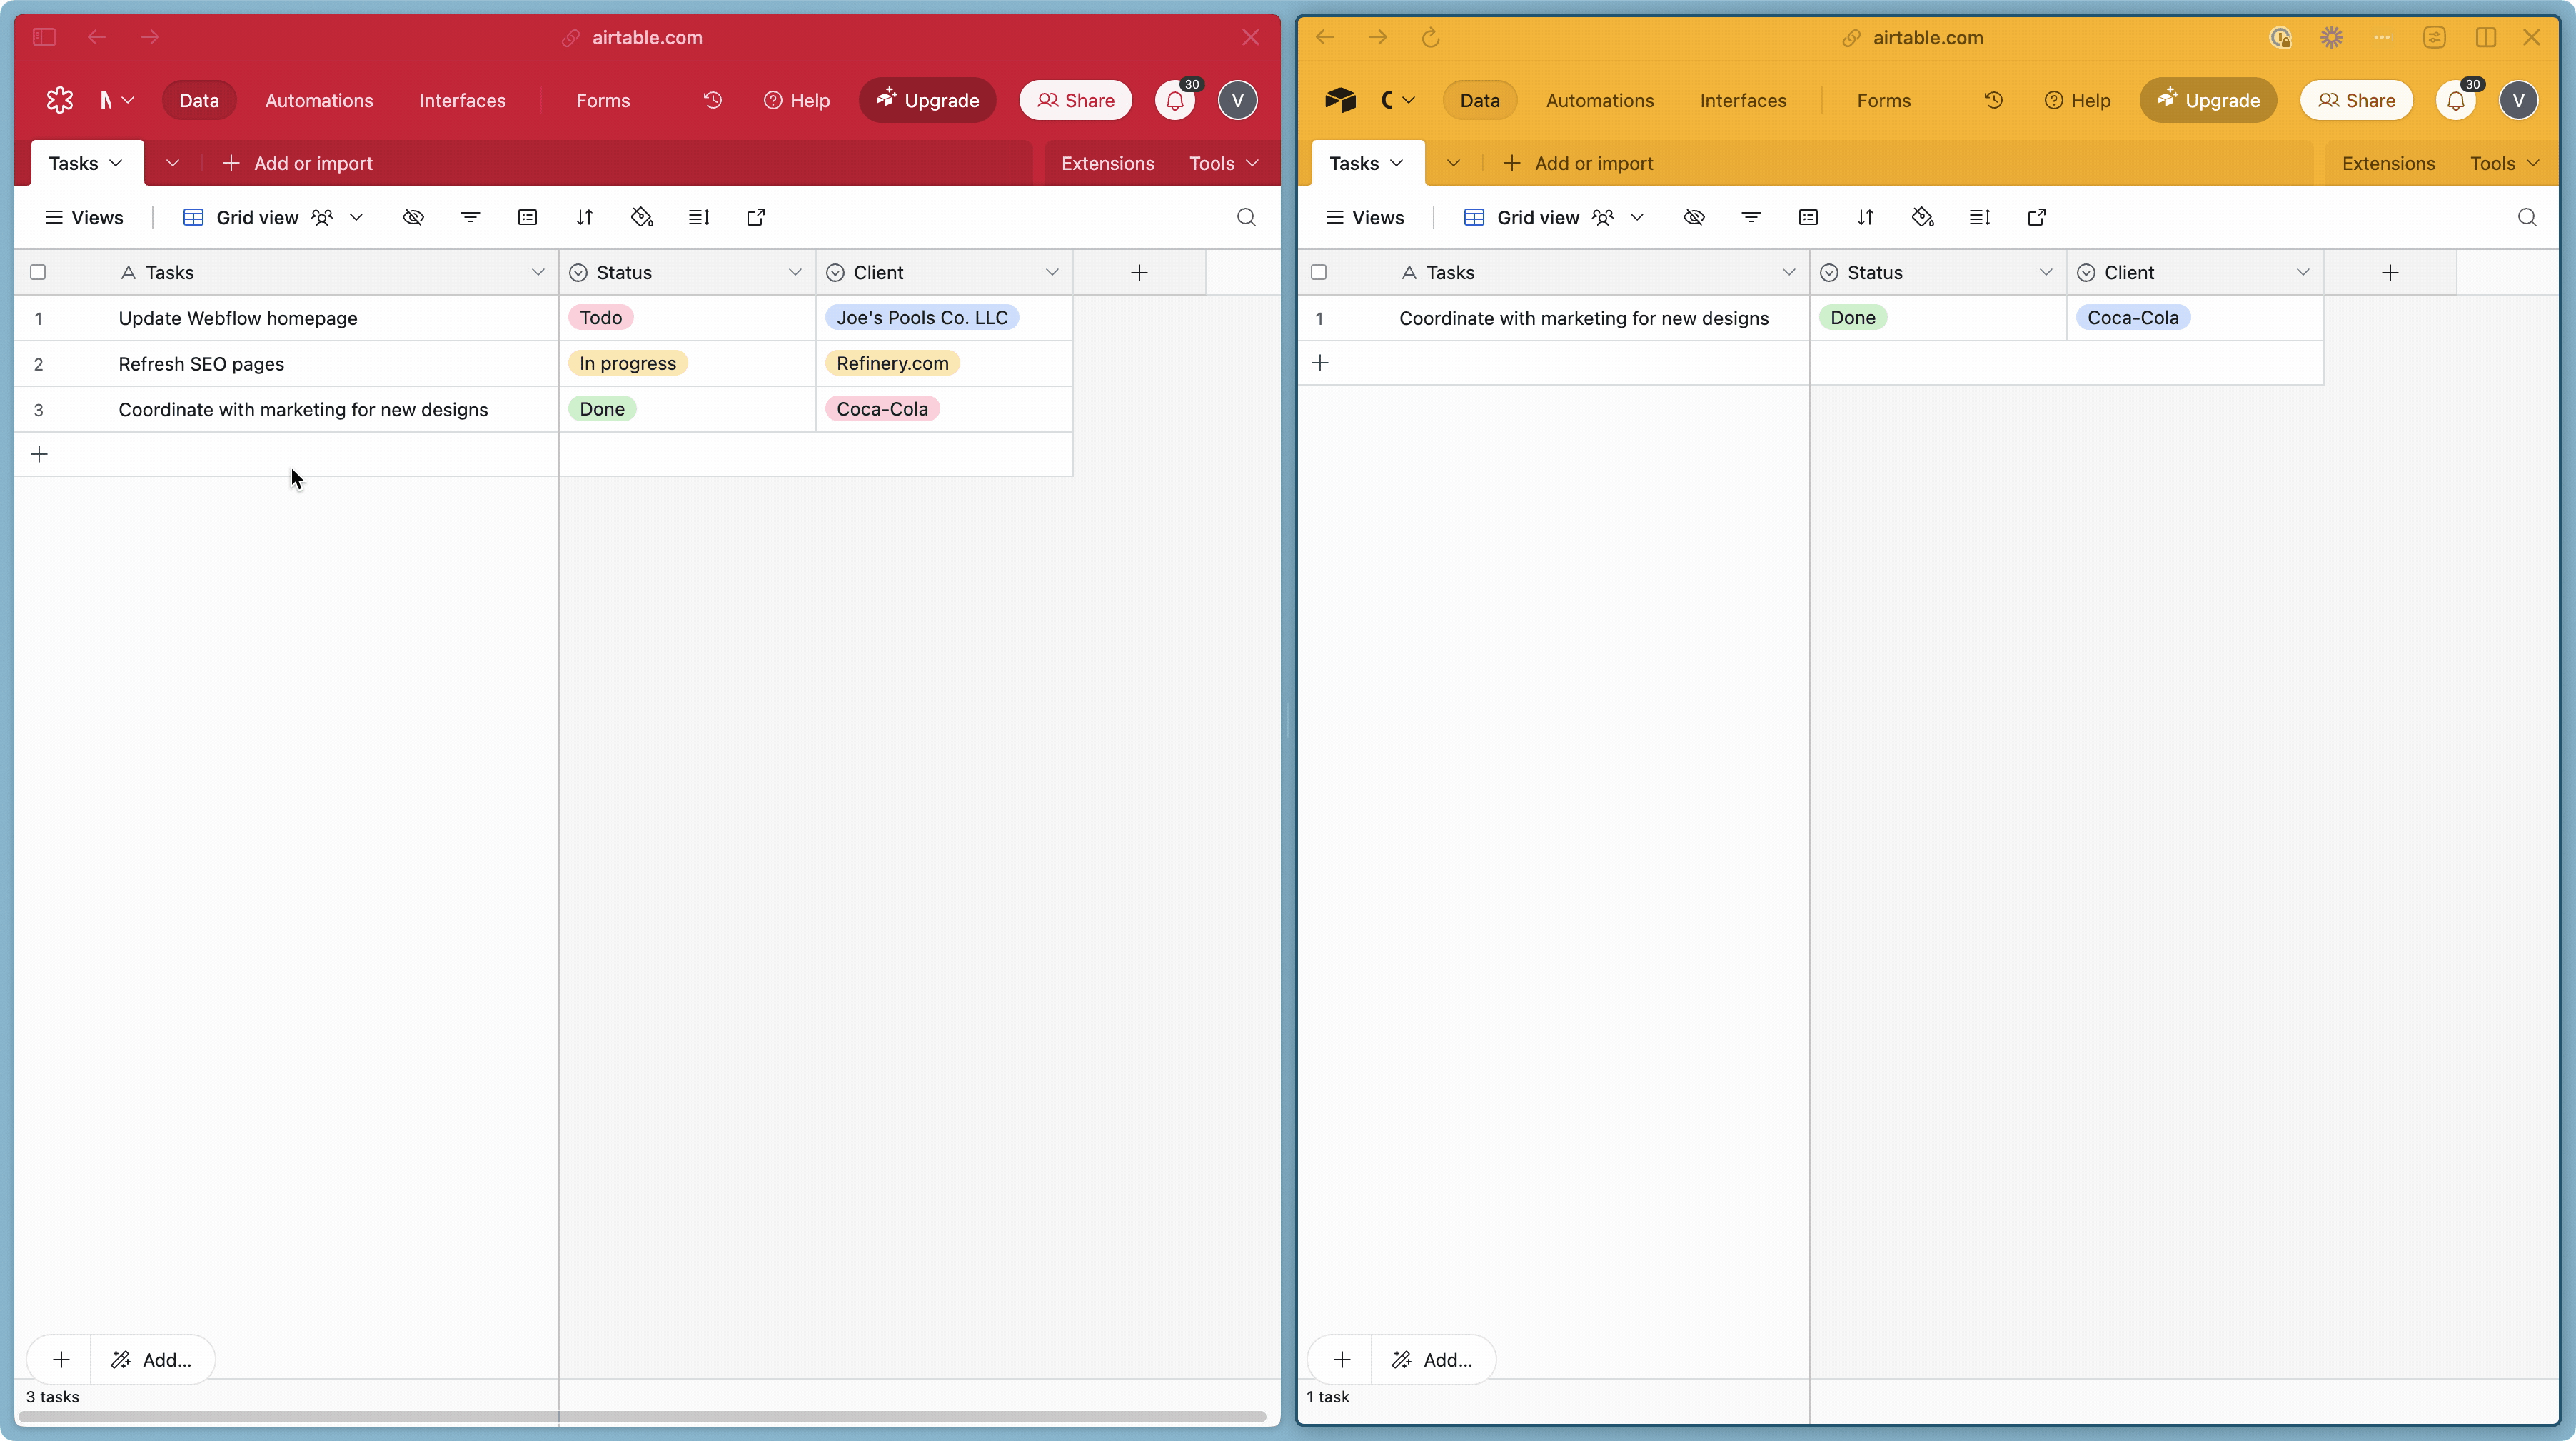
Airtable is a great place to manage your projects, tasks and content. Sometimes though, you need to share data in your Airtable base with your clients. This can get tricky if you don’t want one of your clients to see all of your Airtable data.
Here’s where two-way sync is super helpful. In this tutorial, we’ll show you how to set up a “Master” Airtable base and a “Child” Airtable base, so your clients can have access to just the Airtable data that is relevant to them.
How to set up 2-way synced client Airtable bases
Here’s a step-by-step guide on how you can do this using Whalesync.
1. Setup you Airtable bases
Ensure you have a "Child" Airtable base set up to match the fields you want to sync from your "Master" Airtable base.

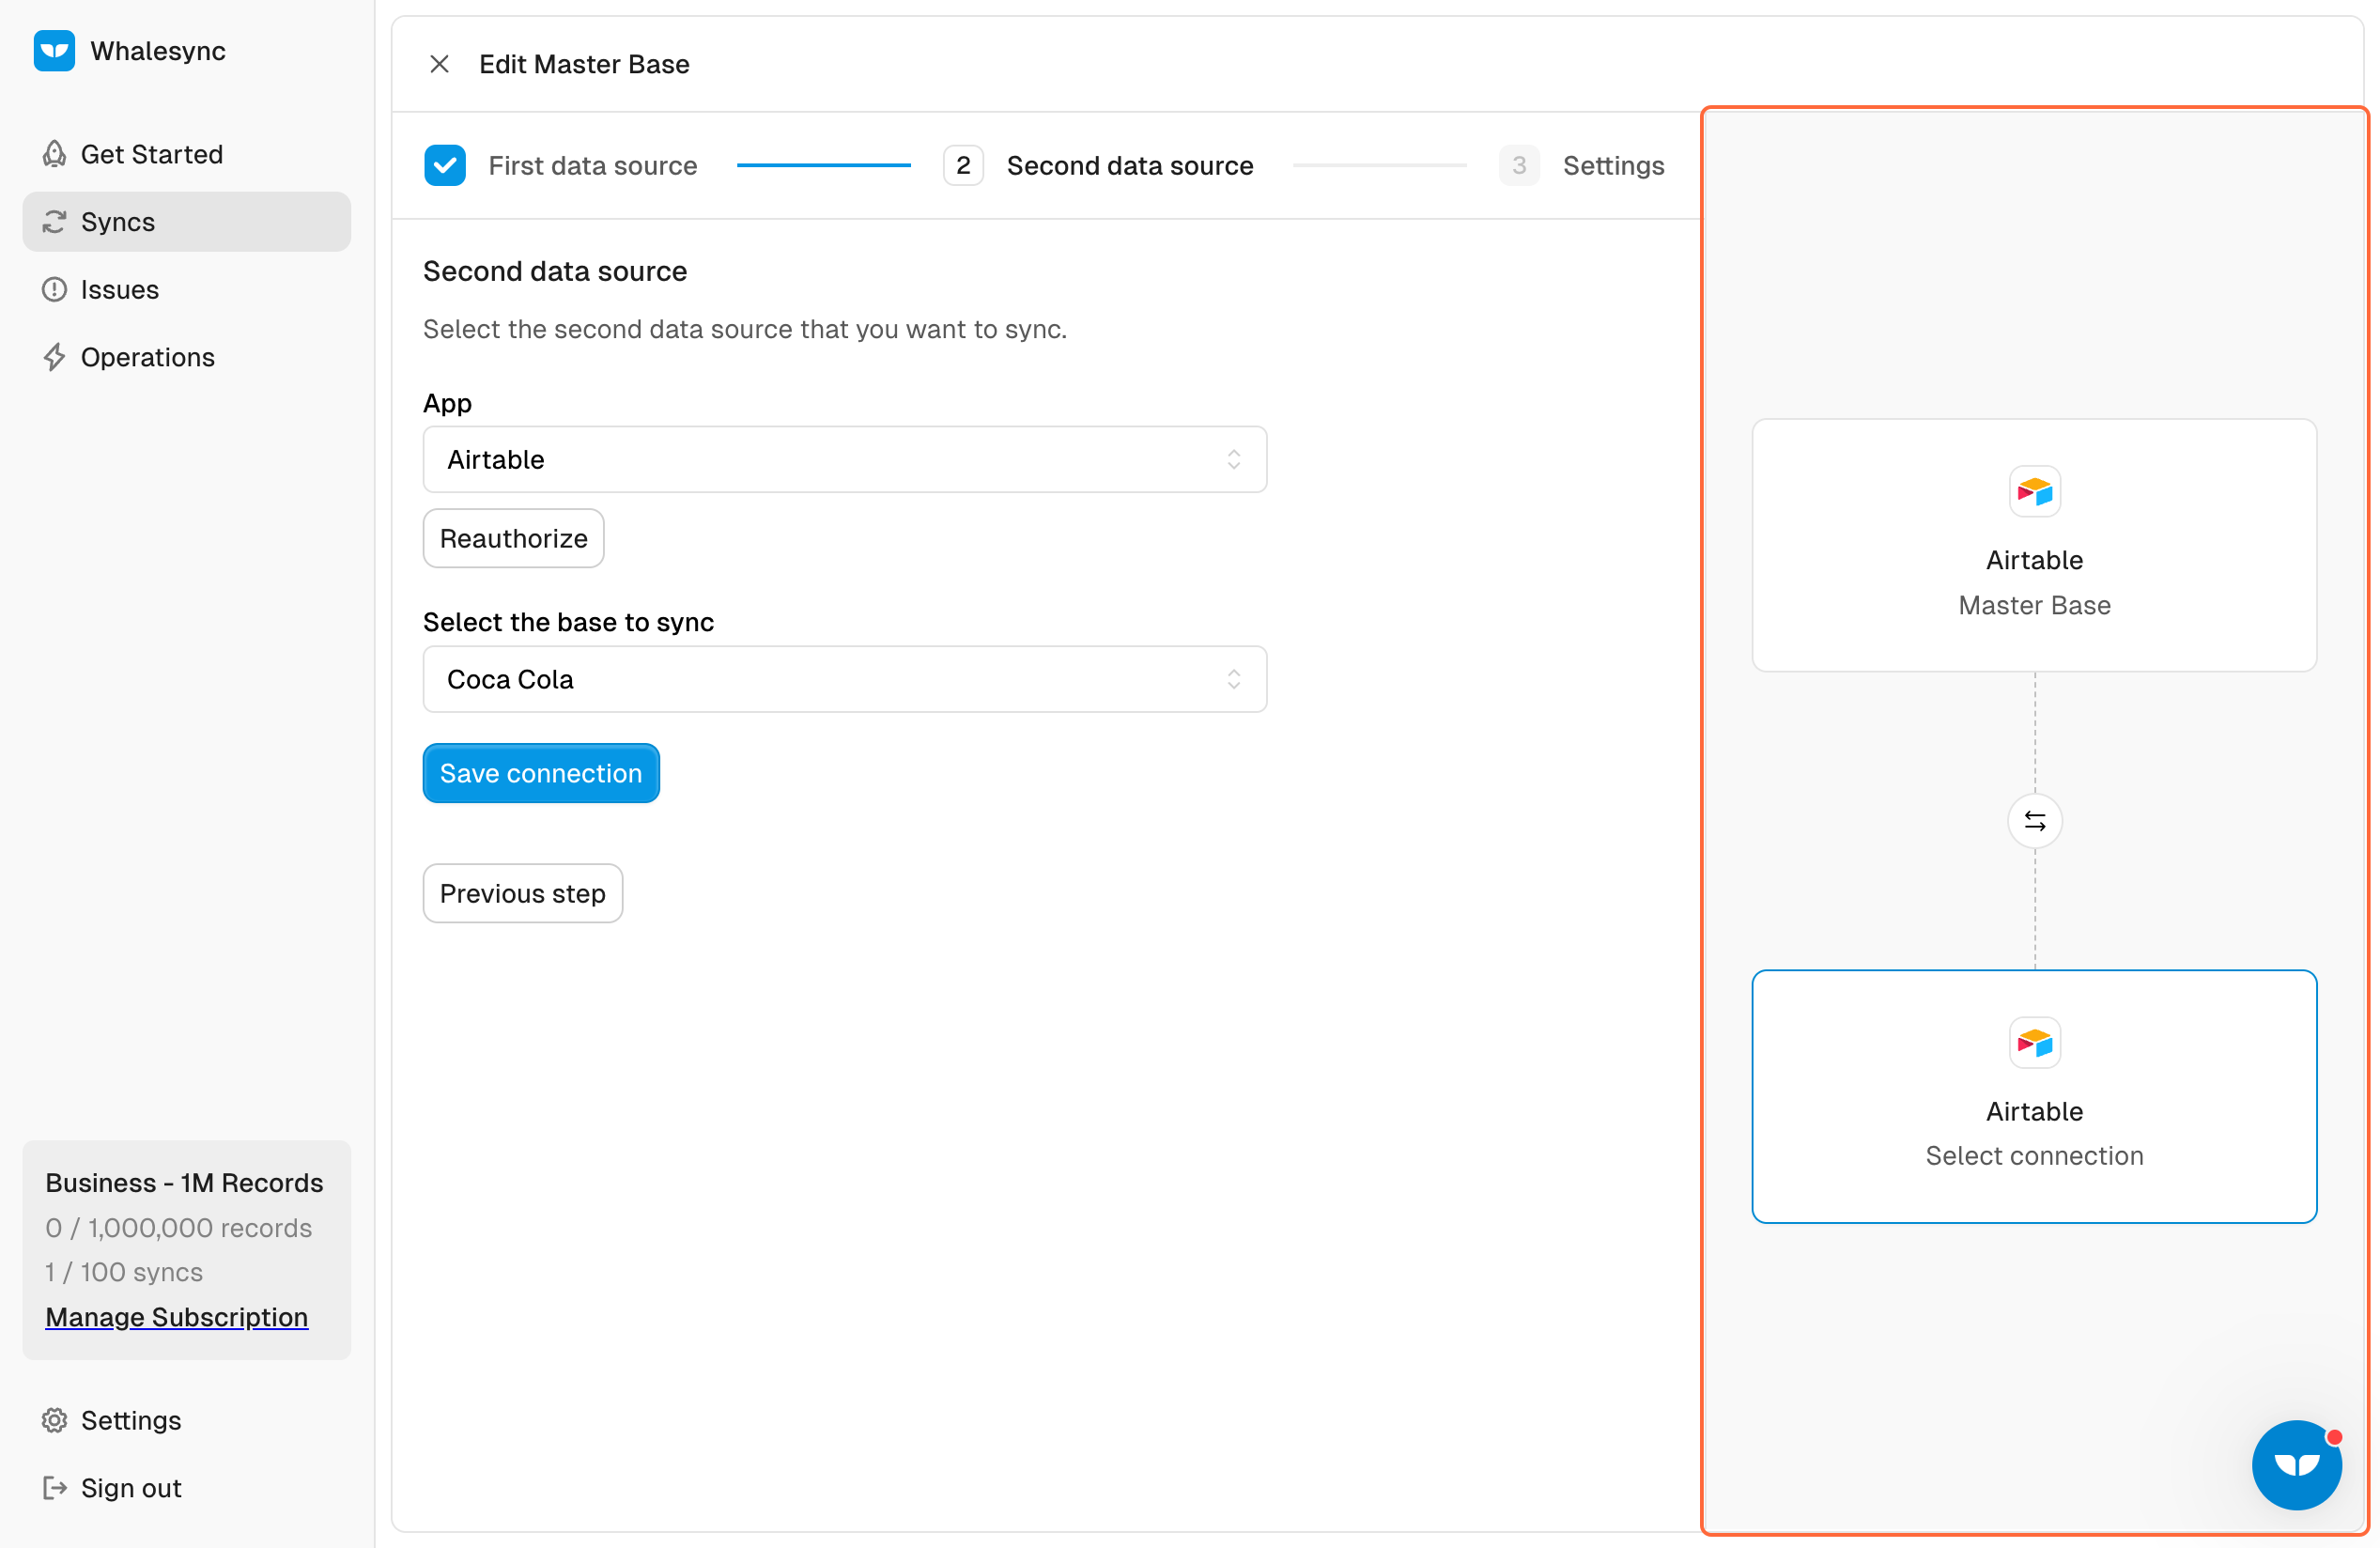
2. Go to app.whalesync.com and create a new sync

3. Connect both your Airtable databases
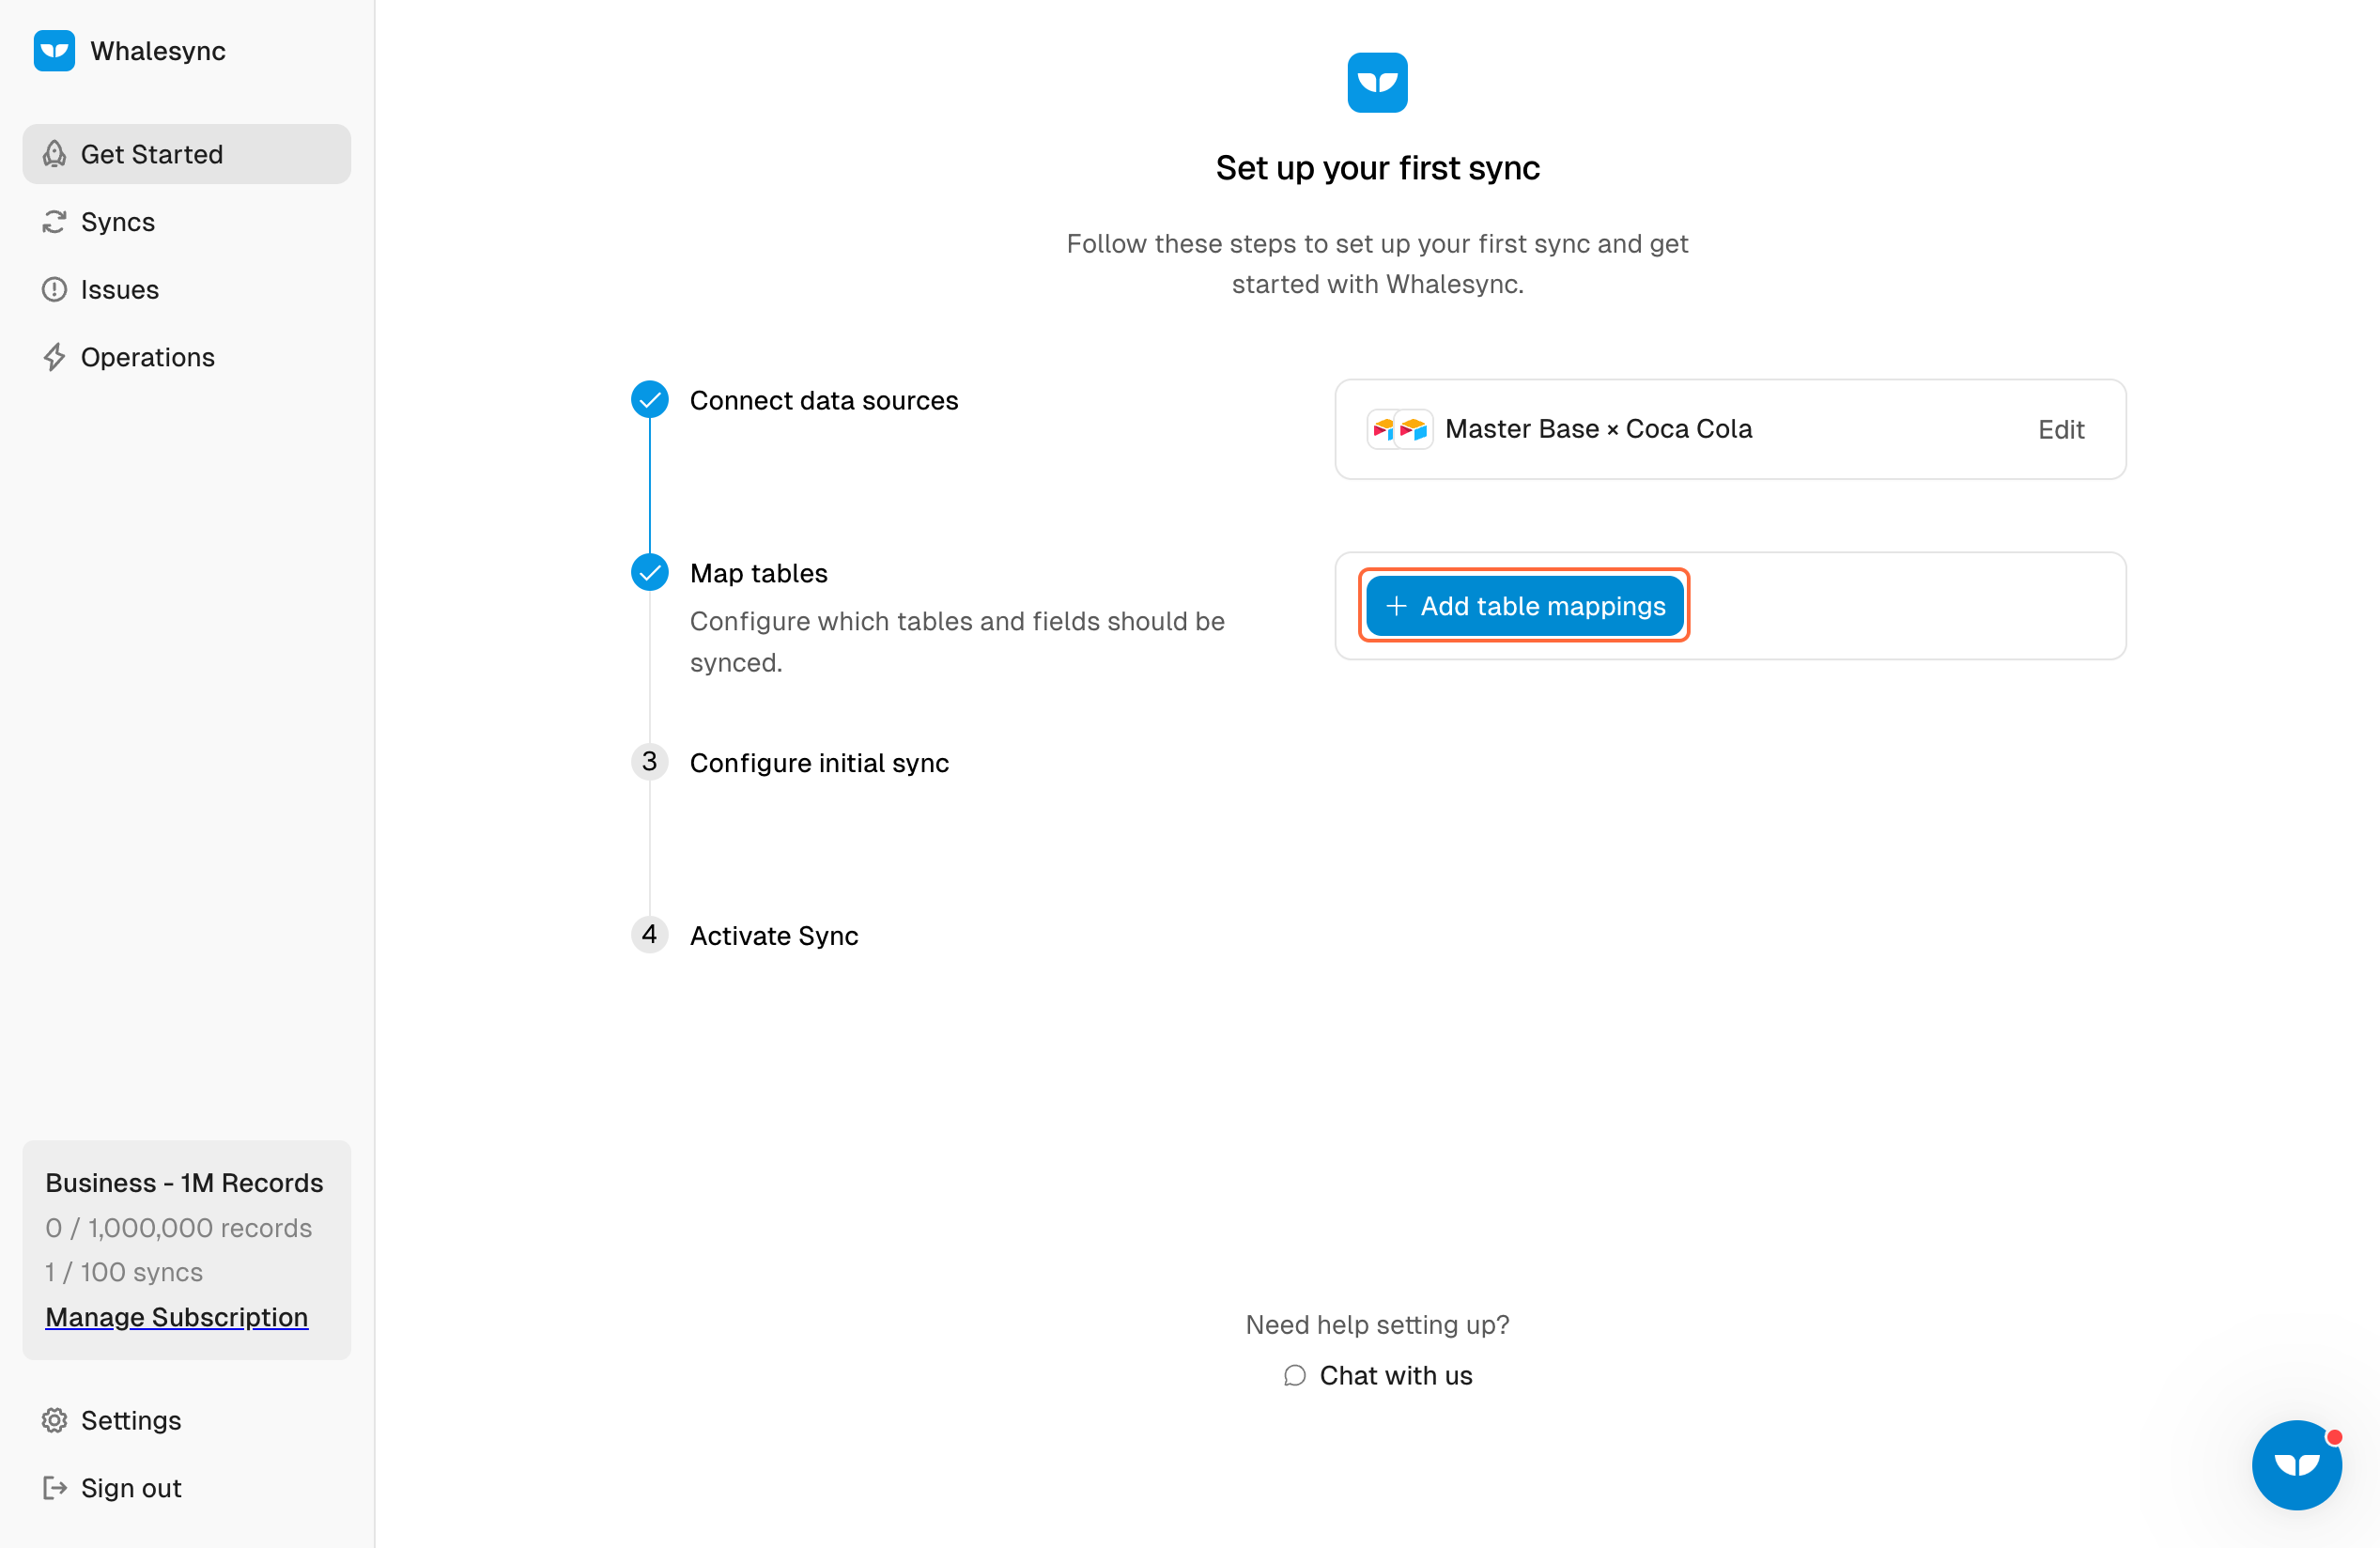
4. Go to table mapping
5. After mapping all your table and fields, hit ‘Filter’
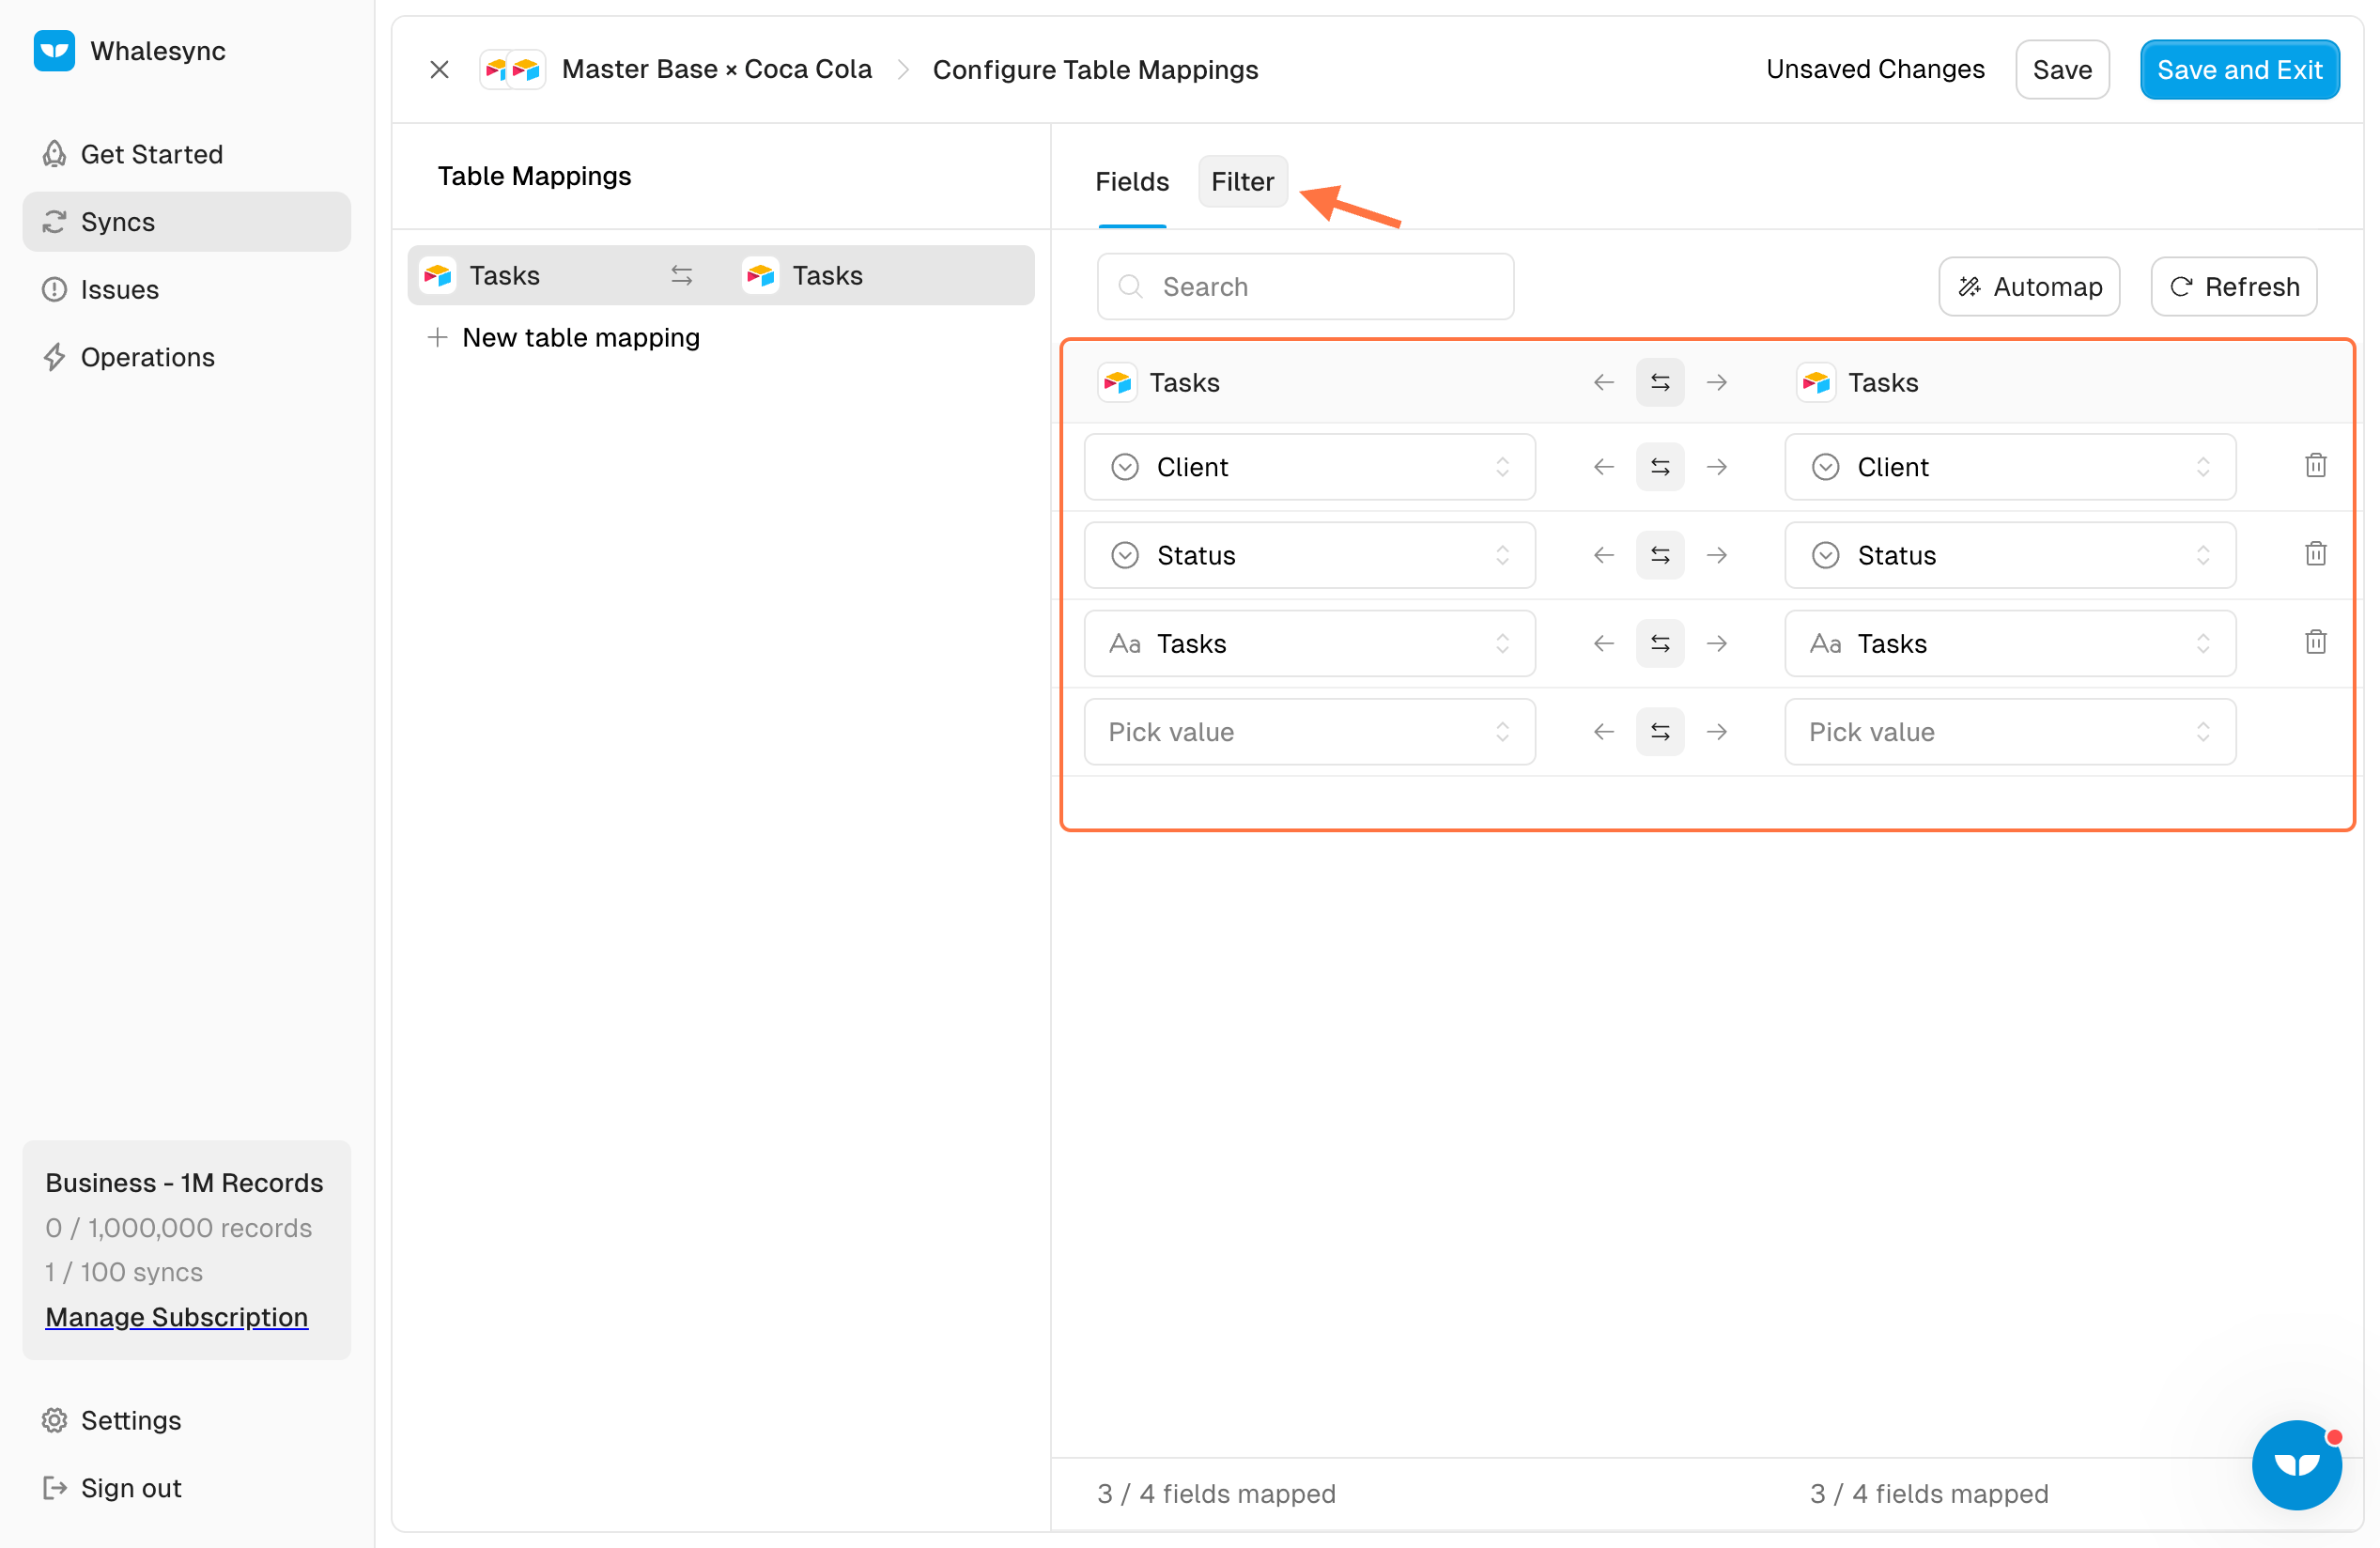
6. Add your filters

In the filter section, choose the ‘Client’ field to specify which data to sync. For this example, I’ll filter by ‘Coca-Cola’ to ensure only records related to this client are included.
7. Go through the Initial Sync stage
8. Activate your sync!
You’re done! You now have a 2-way sync between your Airtable bases.
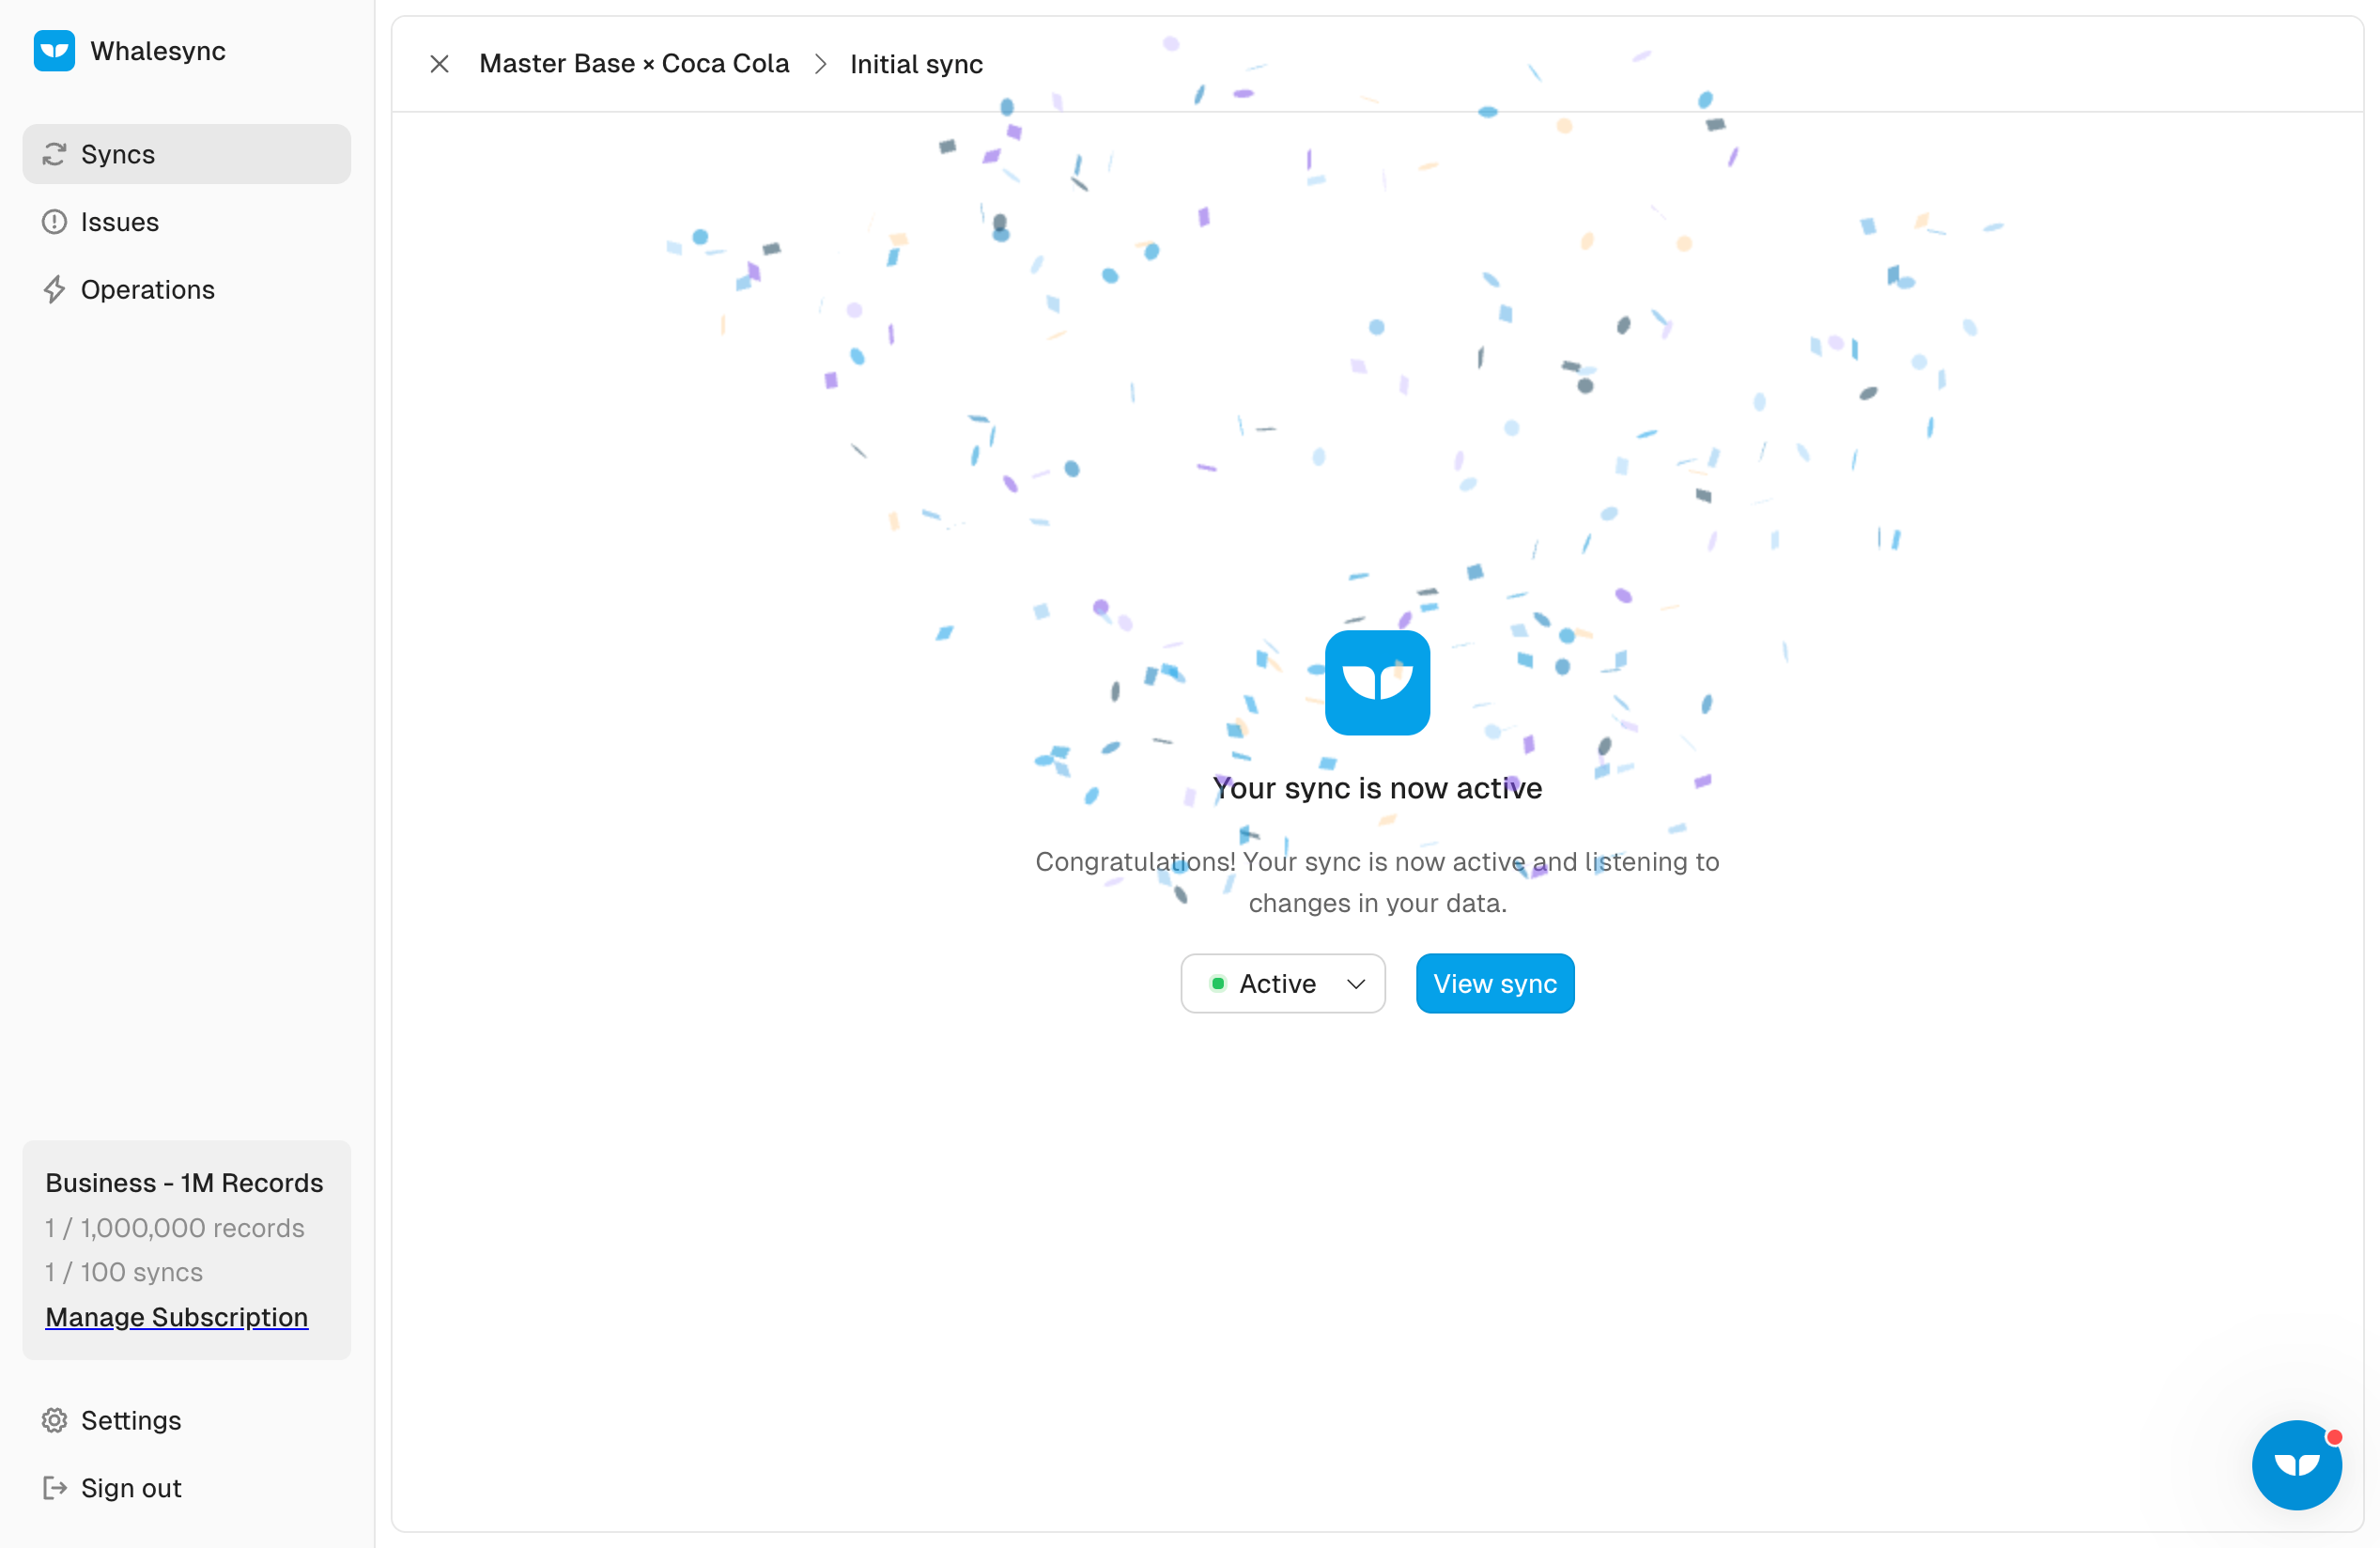
You should now be able to edit from any of the side and update the other instantly!

Ready to give it a try? Check out Whalesync now and start syncing your Airtable bases effortlessly!
Video Tutorial

Subscribe for more
Stay up to date with the latest no-code data news, strategies, and insights sent straight to your inbox!


.svg)


.svg)

