How to export Notion data as a CSV
Here’s a quick tutorial on how to export your Notion data as a CSV.

Export Notion data as a CSV
Notion is a powerful tool for organizing information, but sometimes you need to move your data elsewhere, whether for sharing, backup, analysis, or syncing with other platforms. Exporting your Notion data as a CSV file makes it easy to work with in spreadsheets and databases.
In this post, we’ll walk you through the steps to export Notion as a CSV.
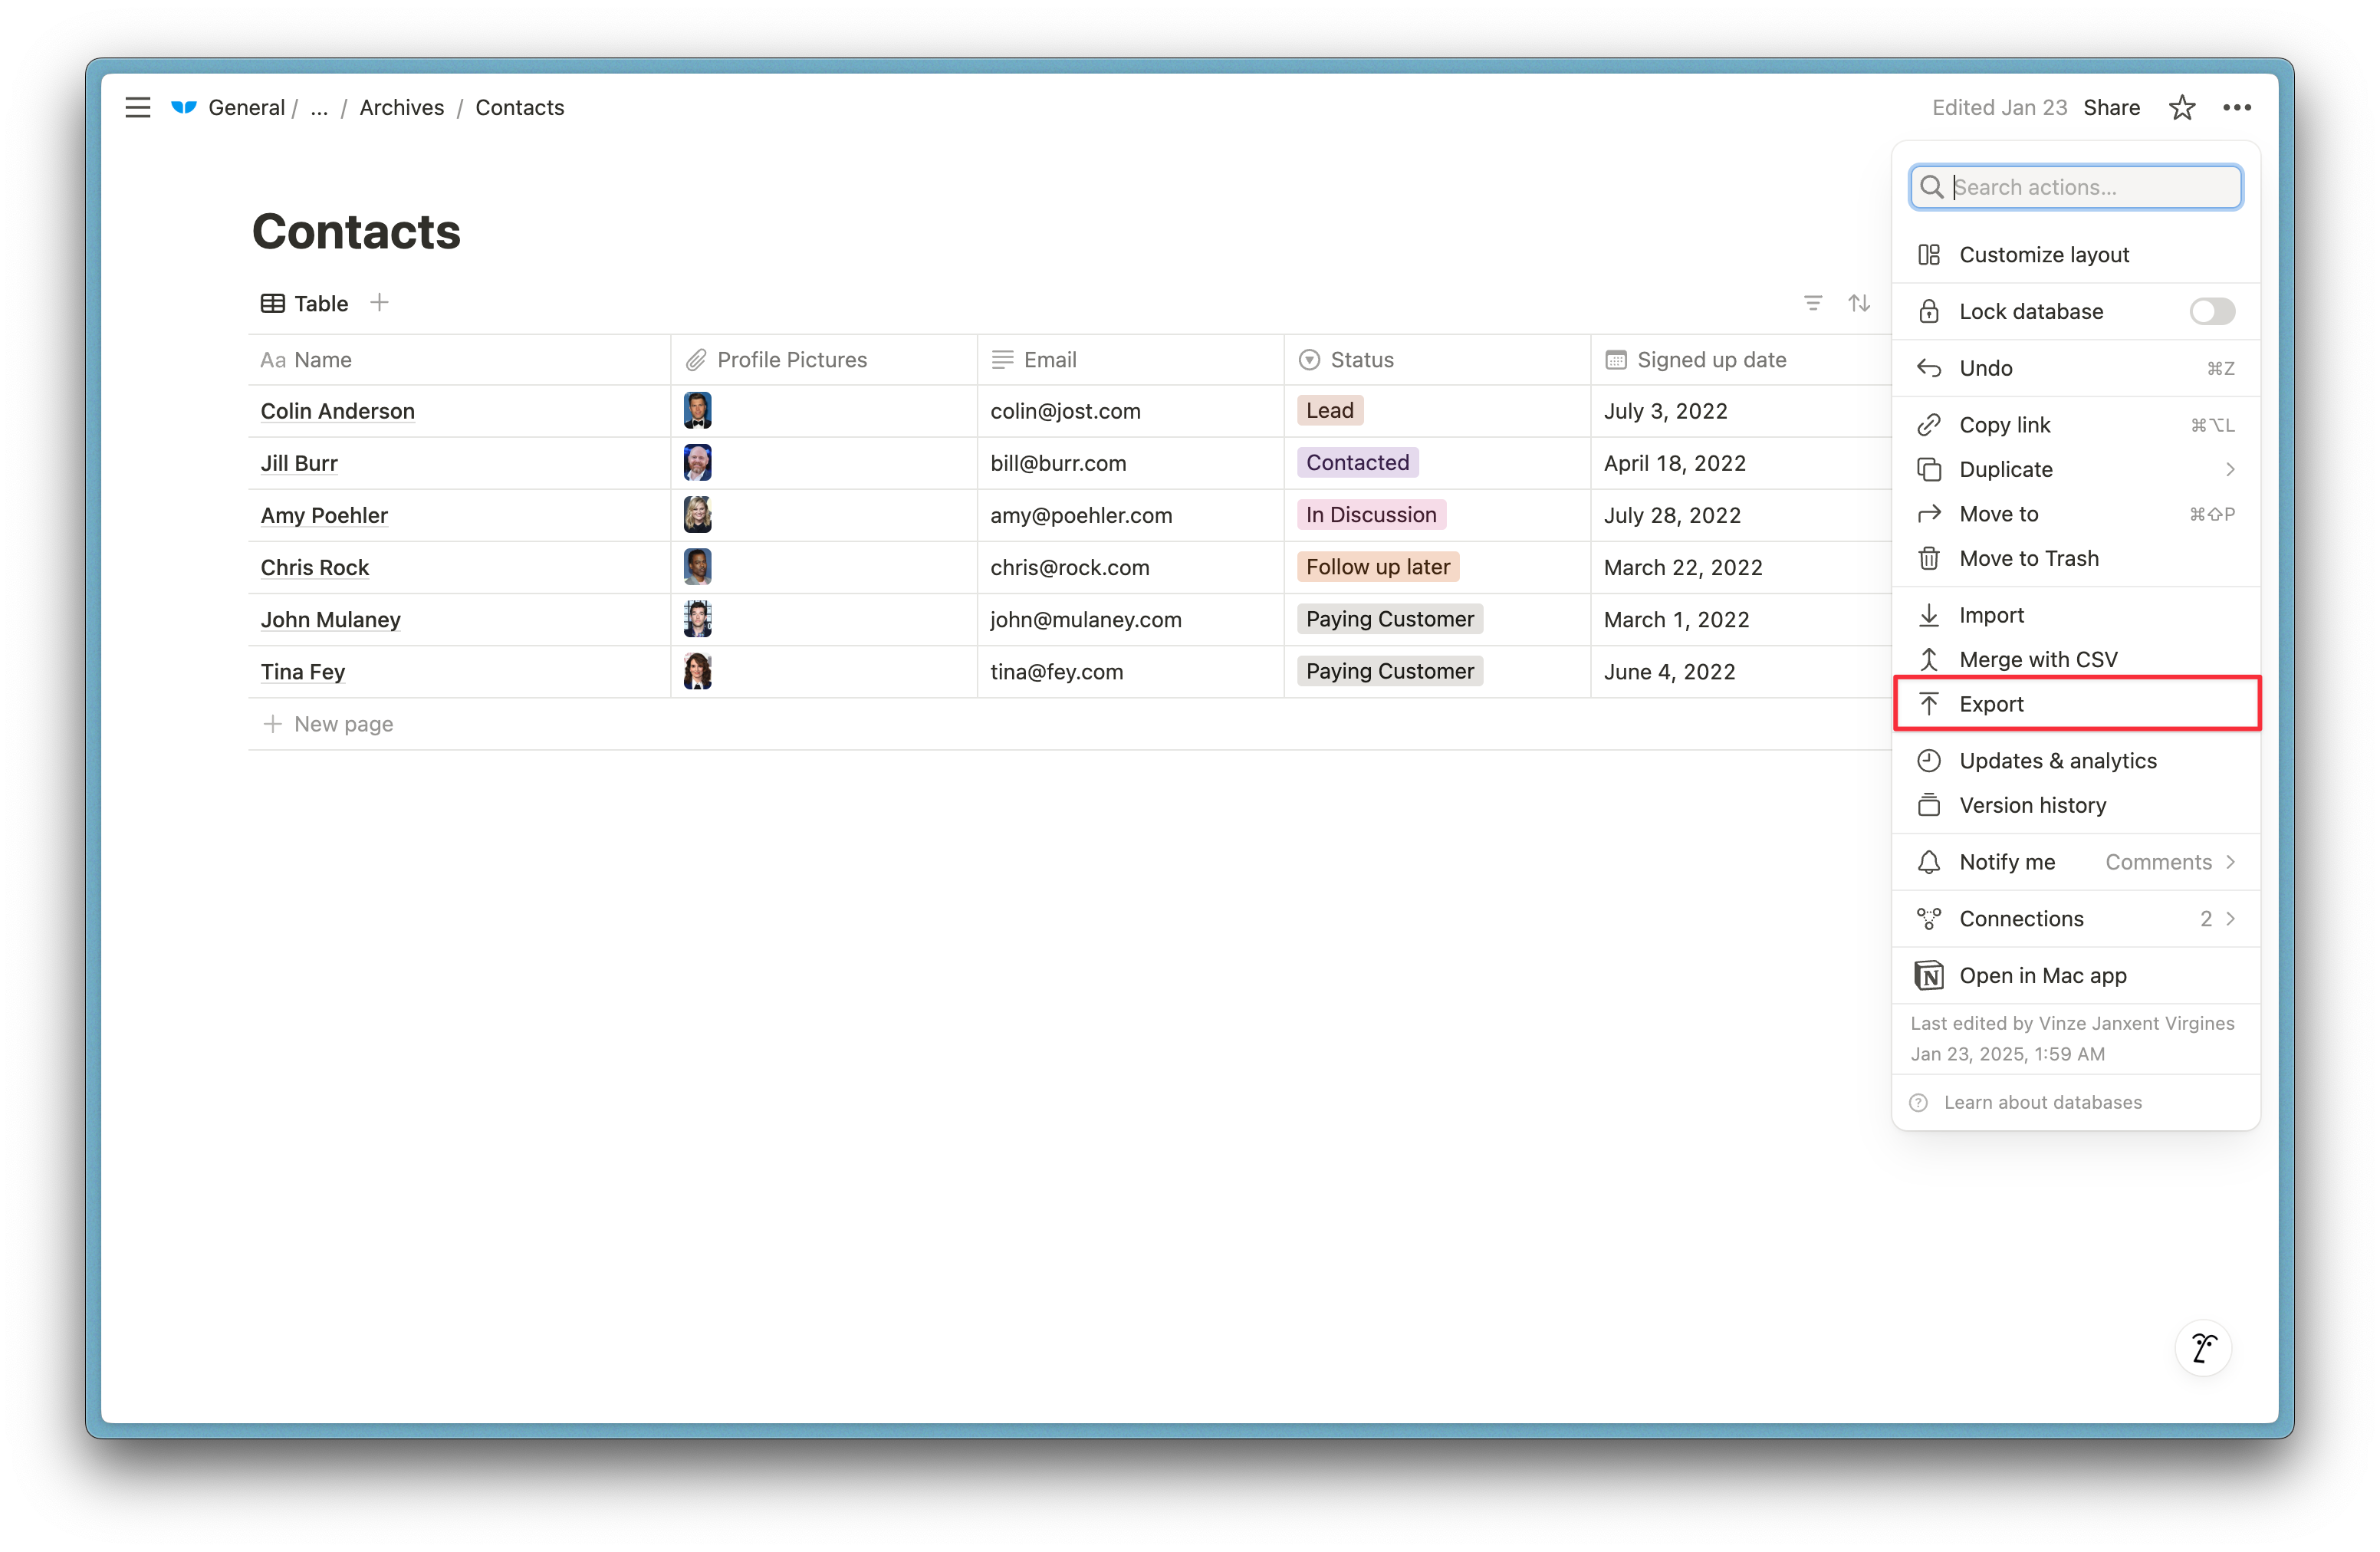
1. Click the three dots above the Notion page you want to export

2. Click export
3. Make sure to select CSV as your export format
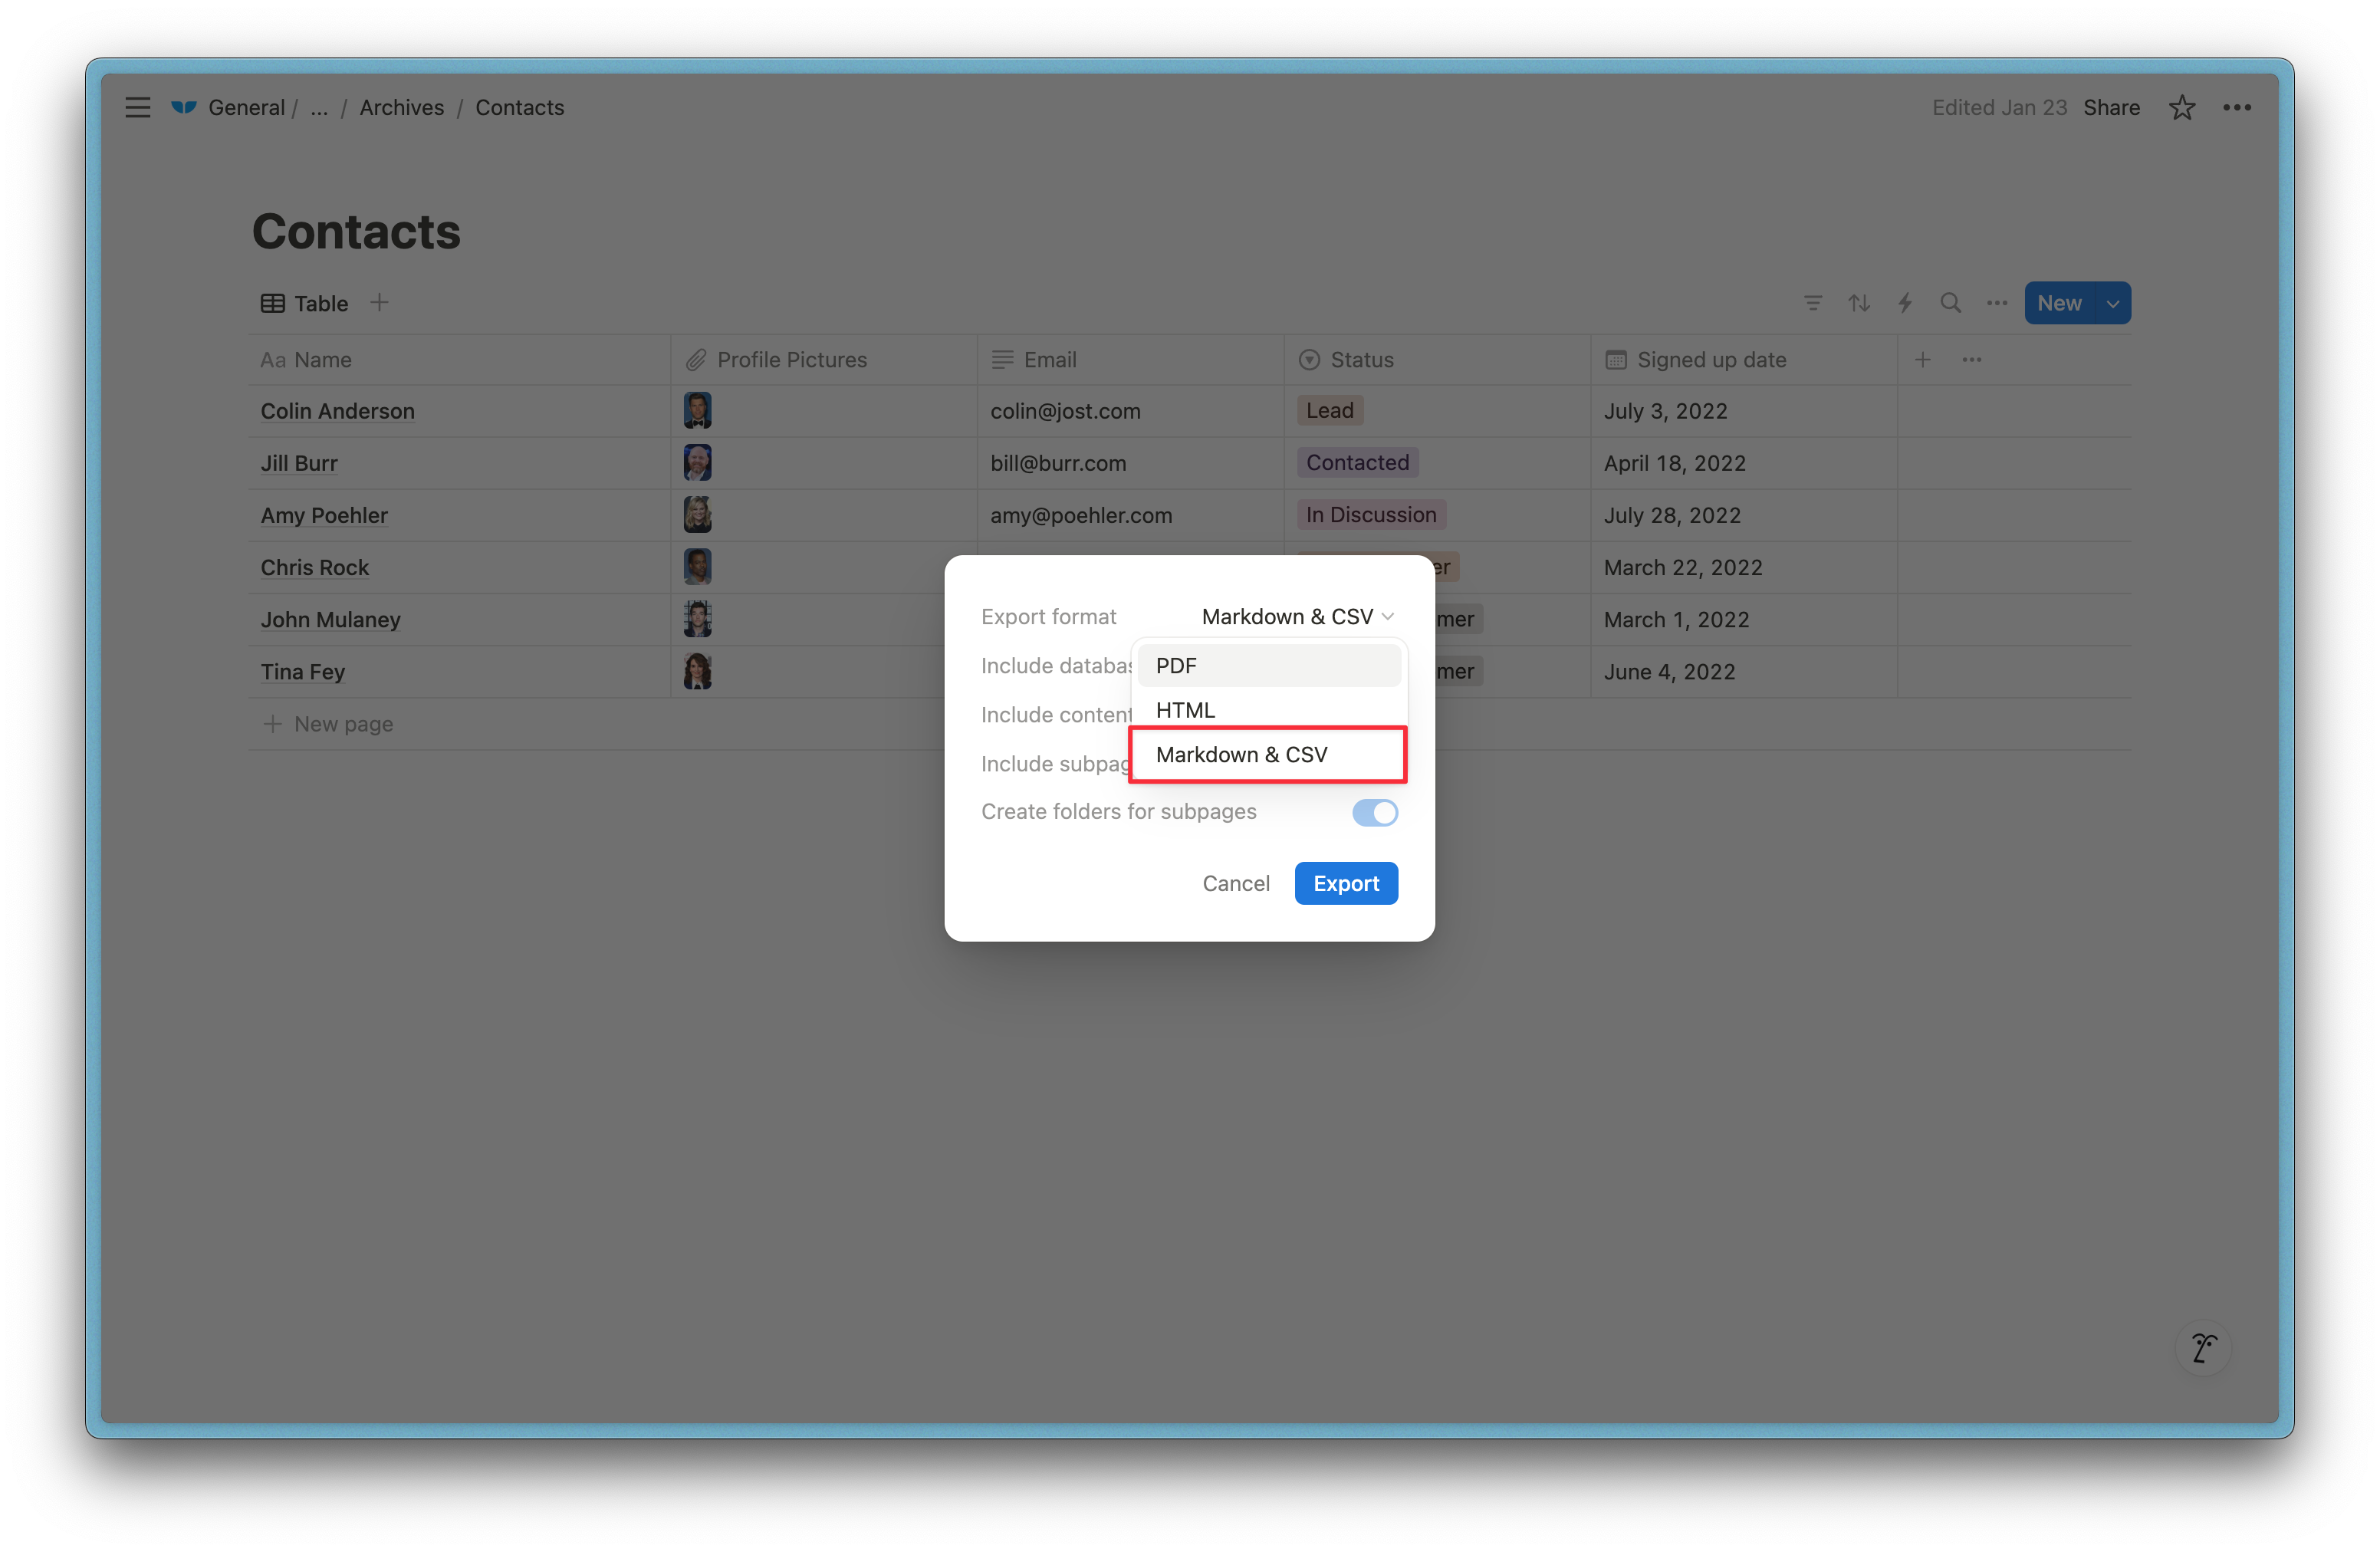
4. Hit export

Your CSV file will automatically download to your computer. Now you can import your CSV to apps like Airtable or Supabase.
Try data syncing with Whalesync
Exporting Notion as a CSV is simple. But manual exports can become tedious, especially if you need to export and import your data repeatedly. Automatically sync Notion with platforms like Airtable, Supabase and Webflow without the hassle of repetitive exports.
Try Whalesync today to simplify your workflow and keep your data up to date easily.

Subscribe for more
Stay up to date with the latest no-code data news, strategies, and insights sent straight to your inbox!


.svg)


.svg)

