How to create a form in Airtable

Learn how to create a form in Airtable in just a few simple steps!
How to create a form in Airtable
At some point in your career, you might find yourself needing to create a form, whether you’ve been tasked with organizing the company offsite, collecting customer feedback, or streamlining internal processes. Forms are an efficient way to gather and store information, ensuring that everything remains structured and accessible.
Airtable is a fantastic tool for this, especially if you already use it as your database. Its built-in form builder allows you to collect and organize data seamlessly, without the need for extra tools or manual entry.
In this guide, I’ll walk you through how to create a form in Airtable and how you can customize it to fit your needs.
It’s quick and easy, I promise.
1. Open your Airtable base and add a form
Open your Airtable base and click on “Forms” at the top of the window. You can choose a new base to work on or an existing base. In my case, I’ve chosen a new base and I’m creating a form for a Partner Program.
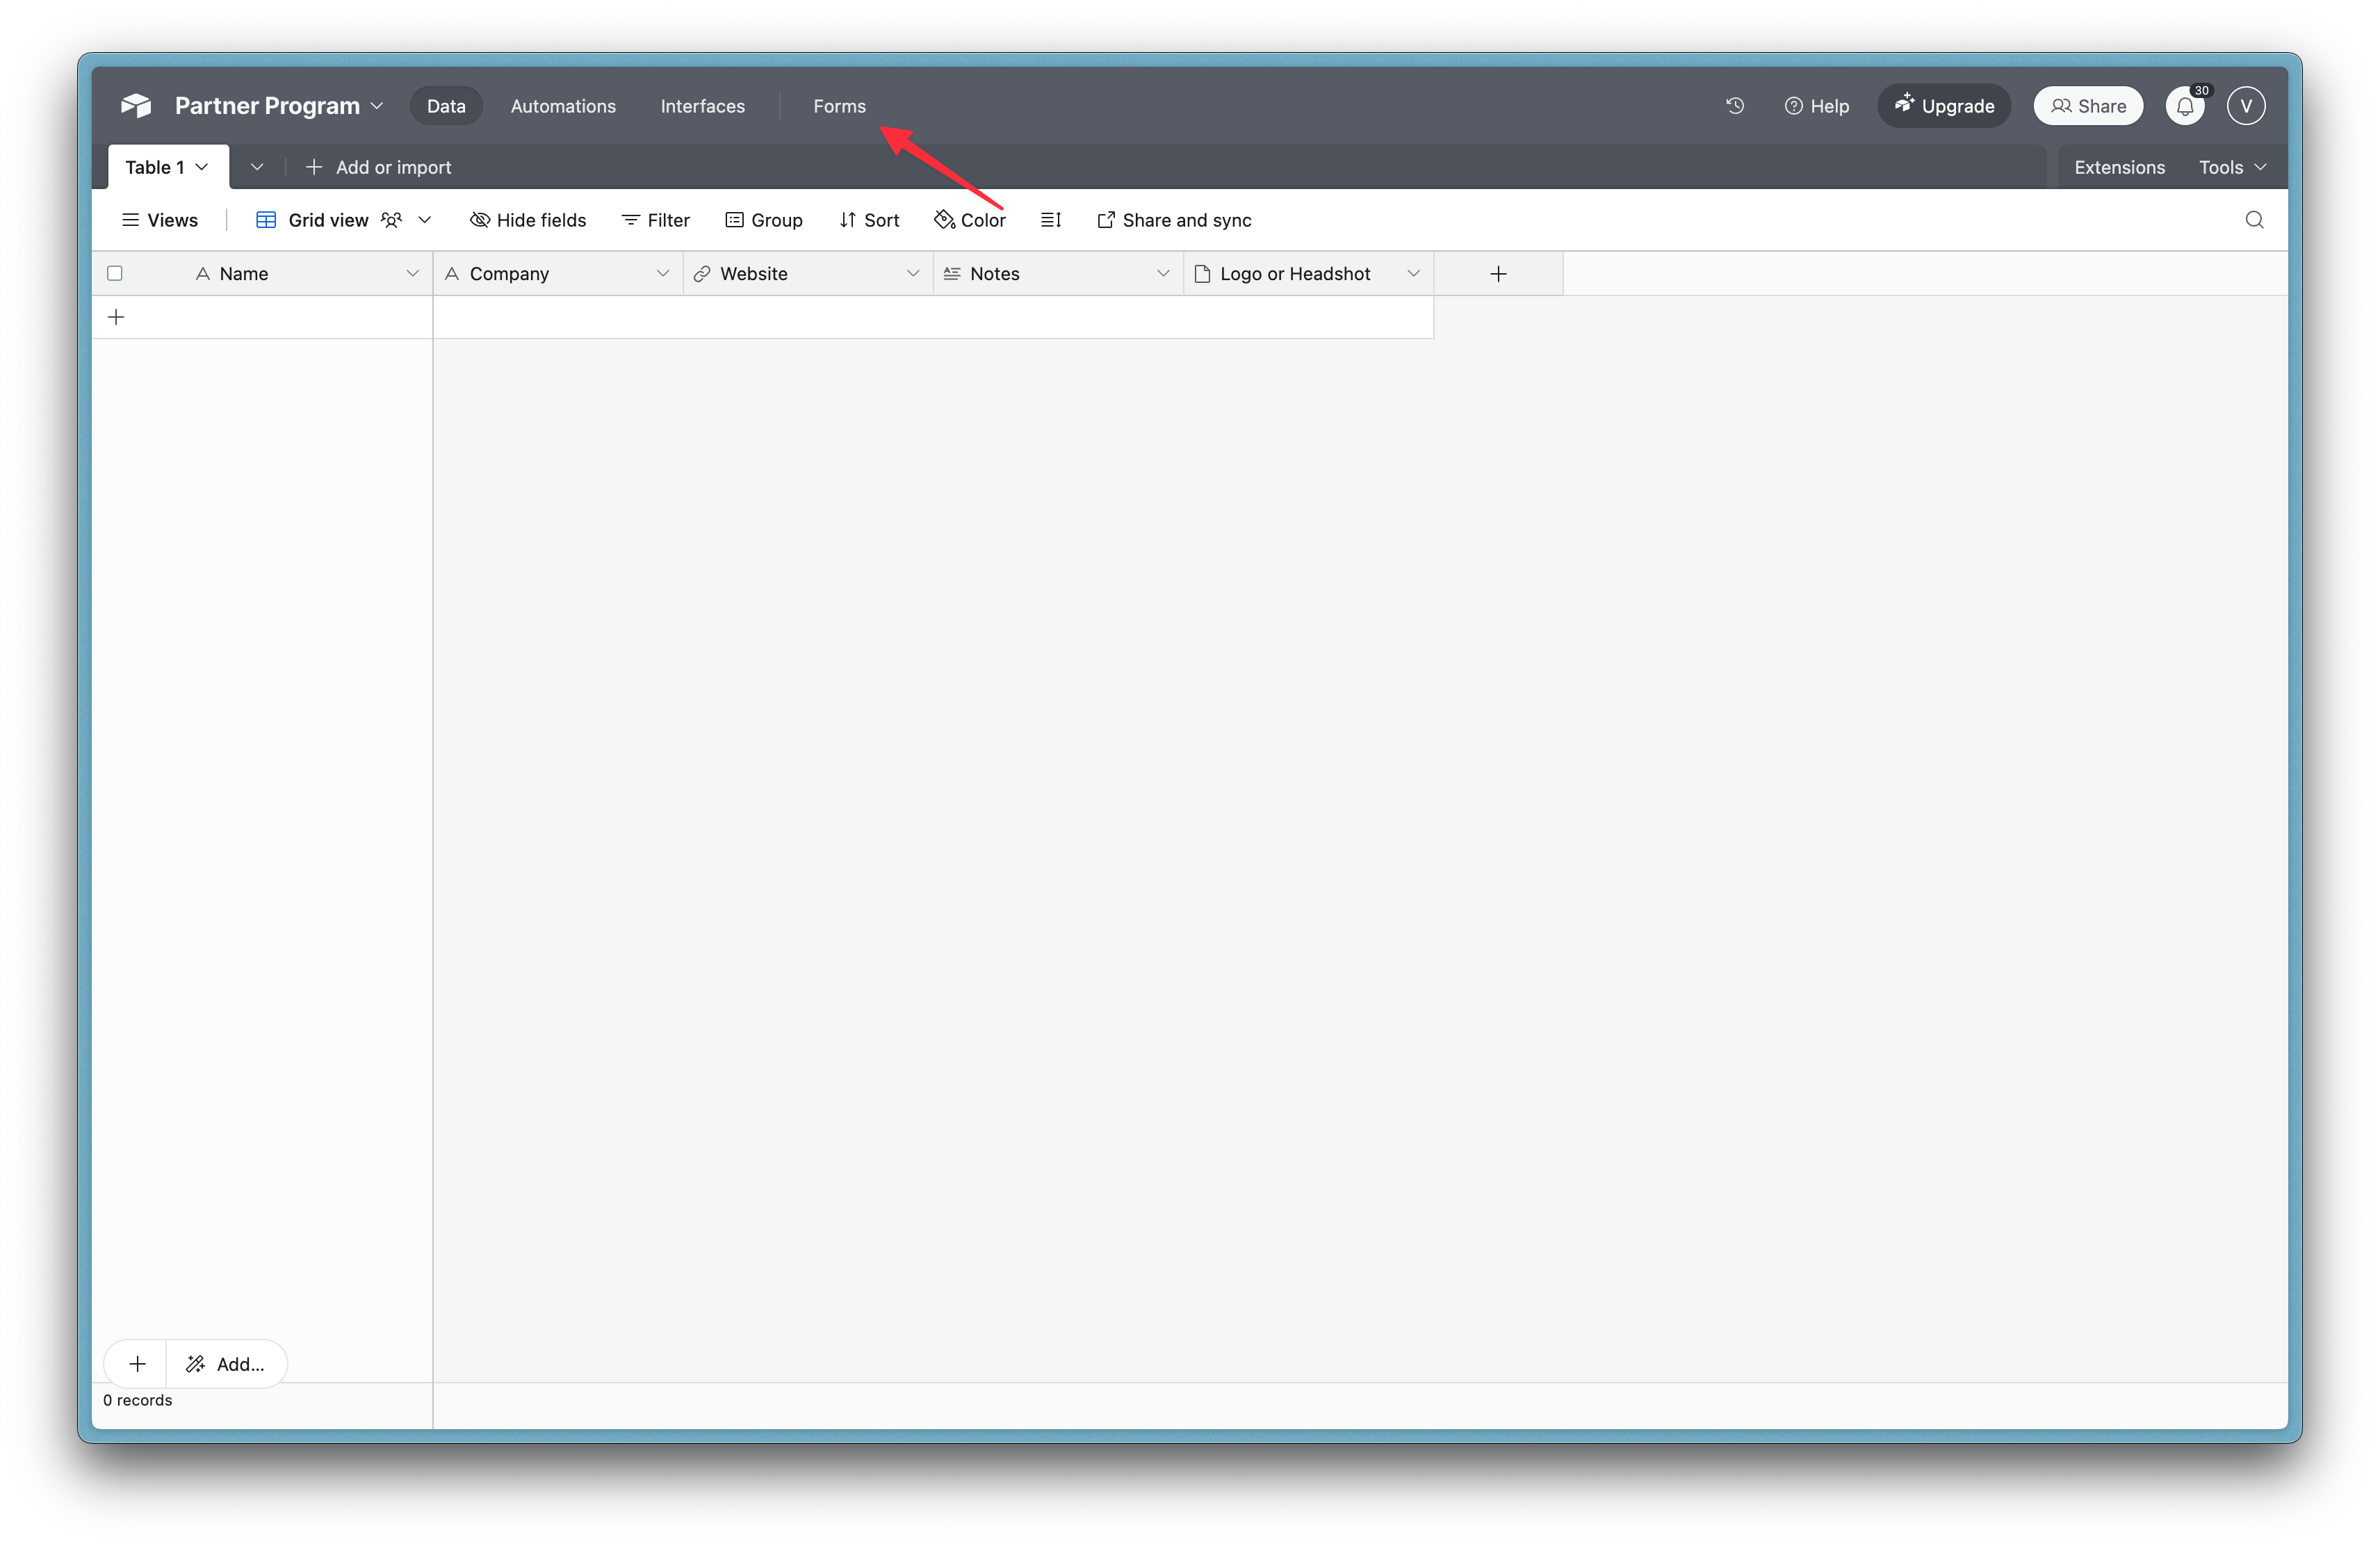
2. Click ‘New Form’
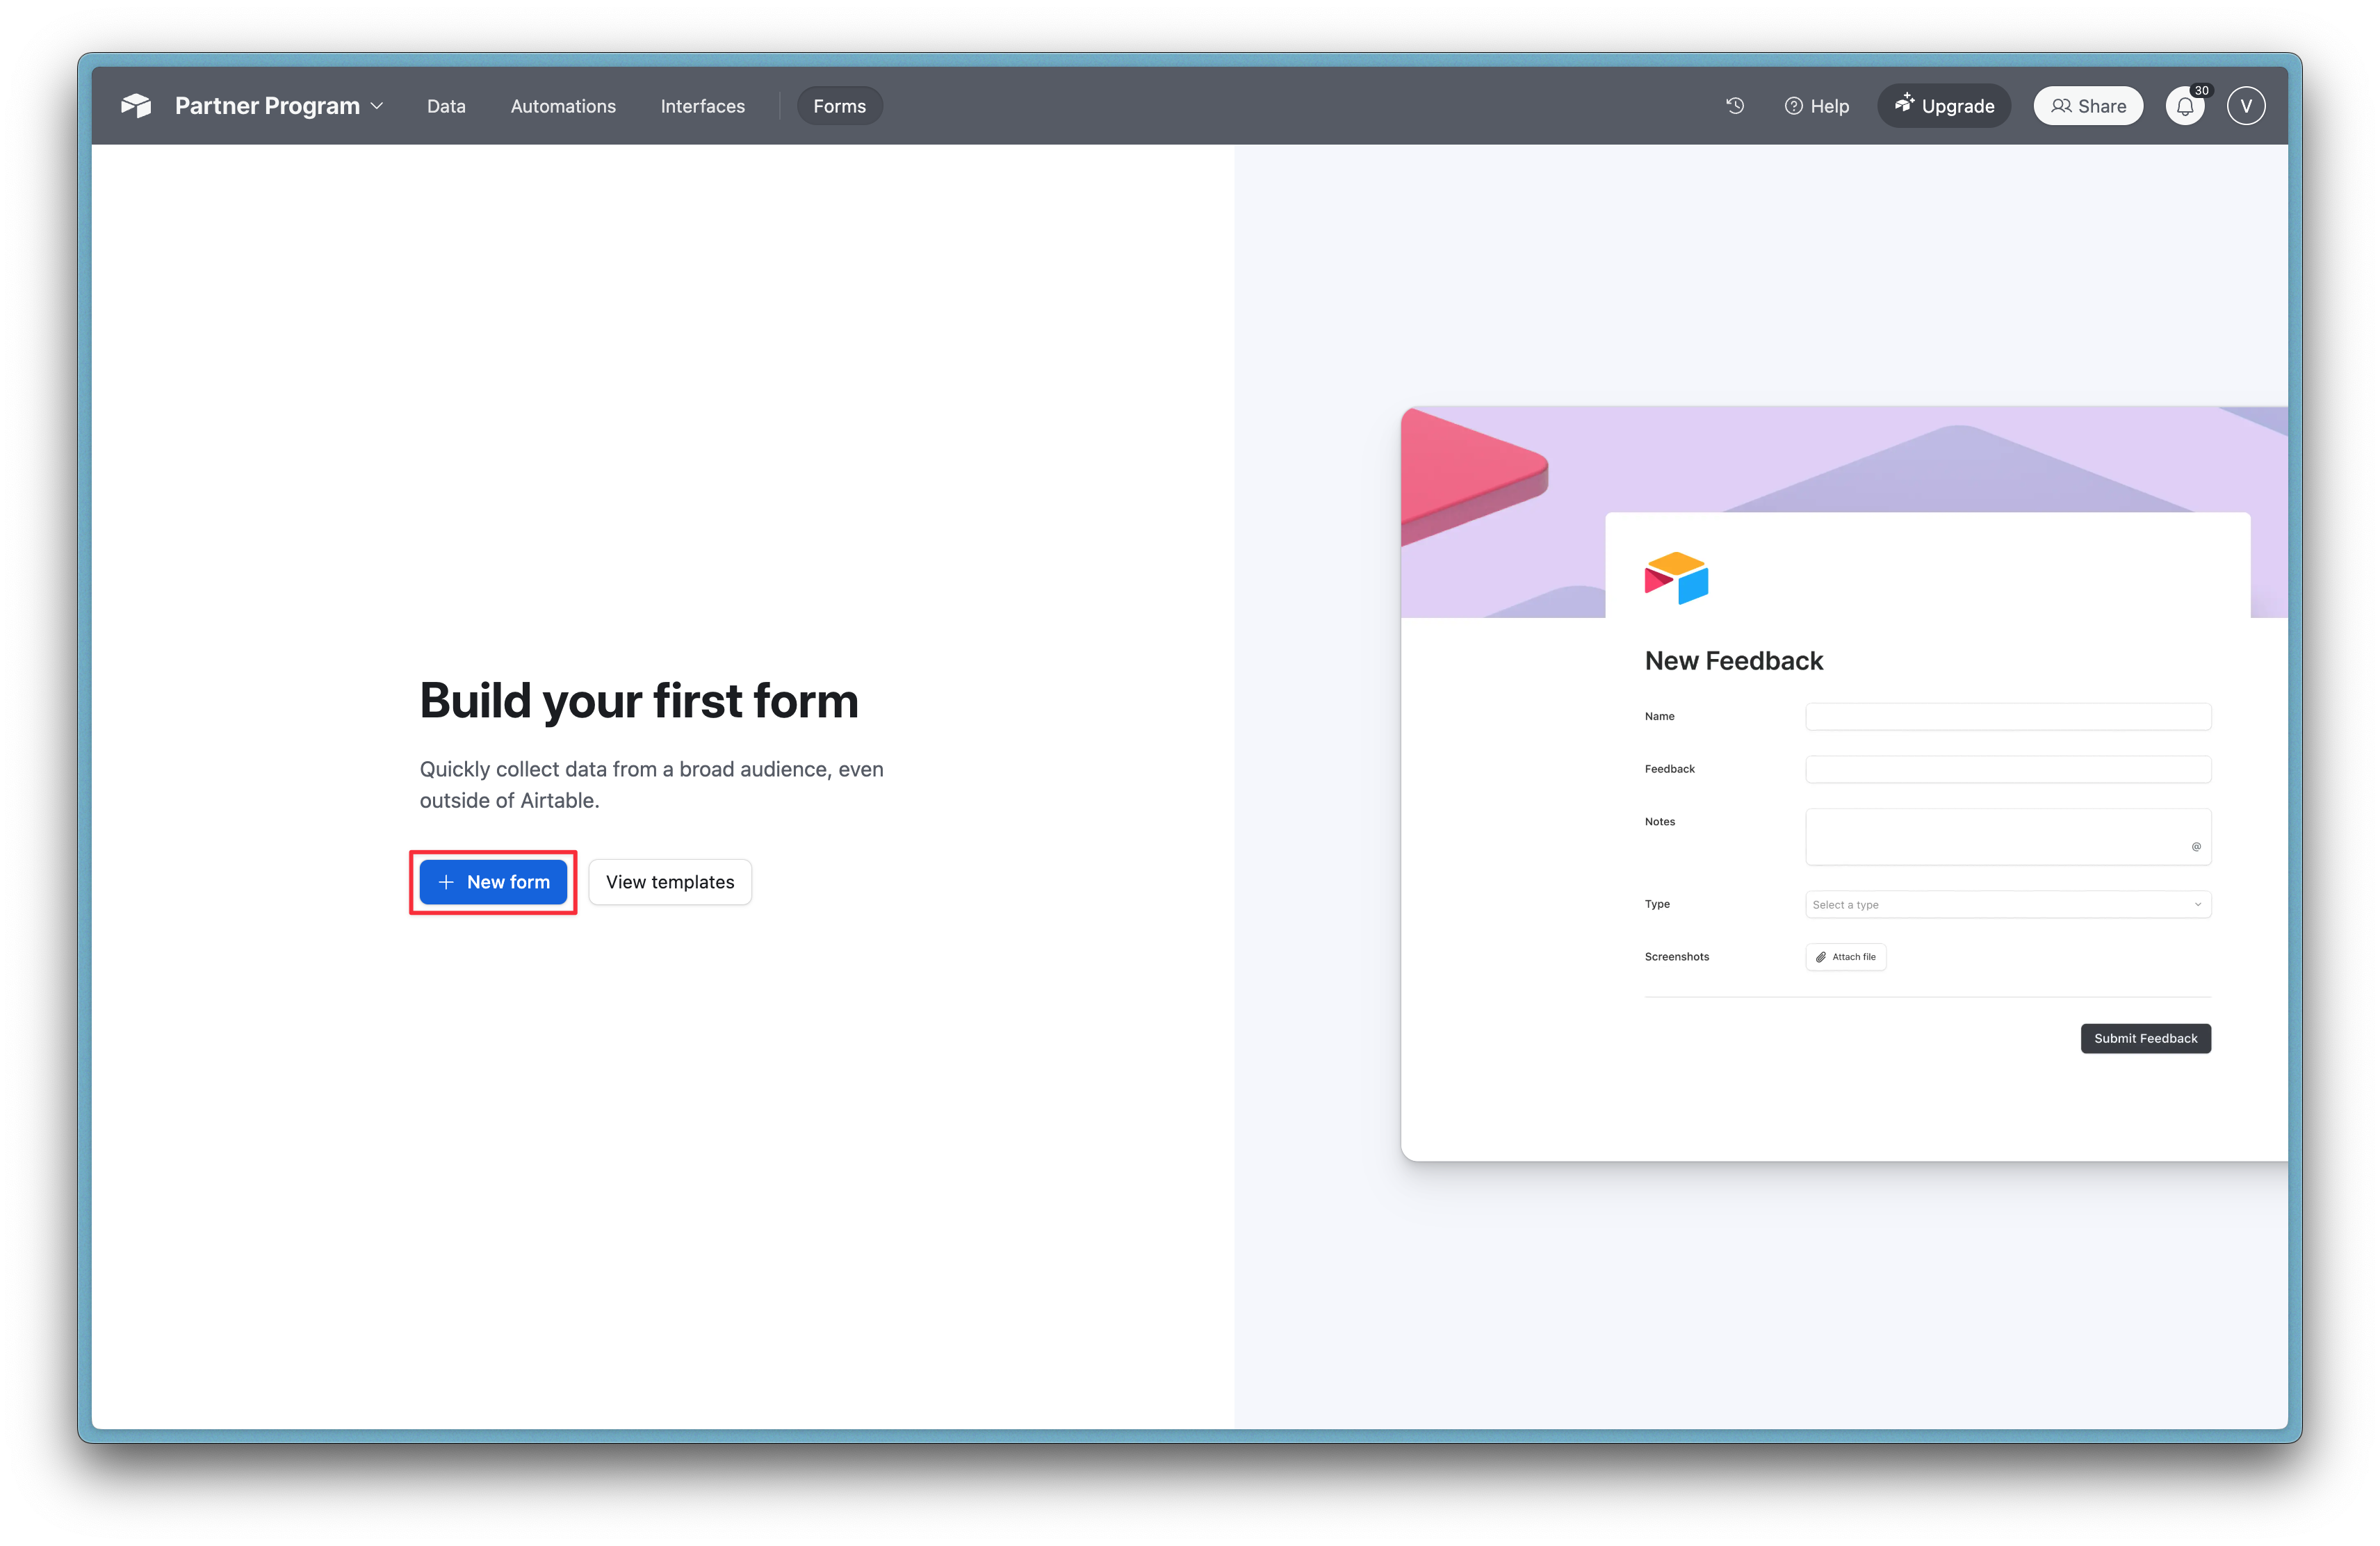
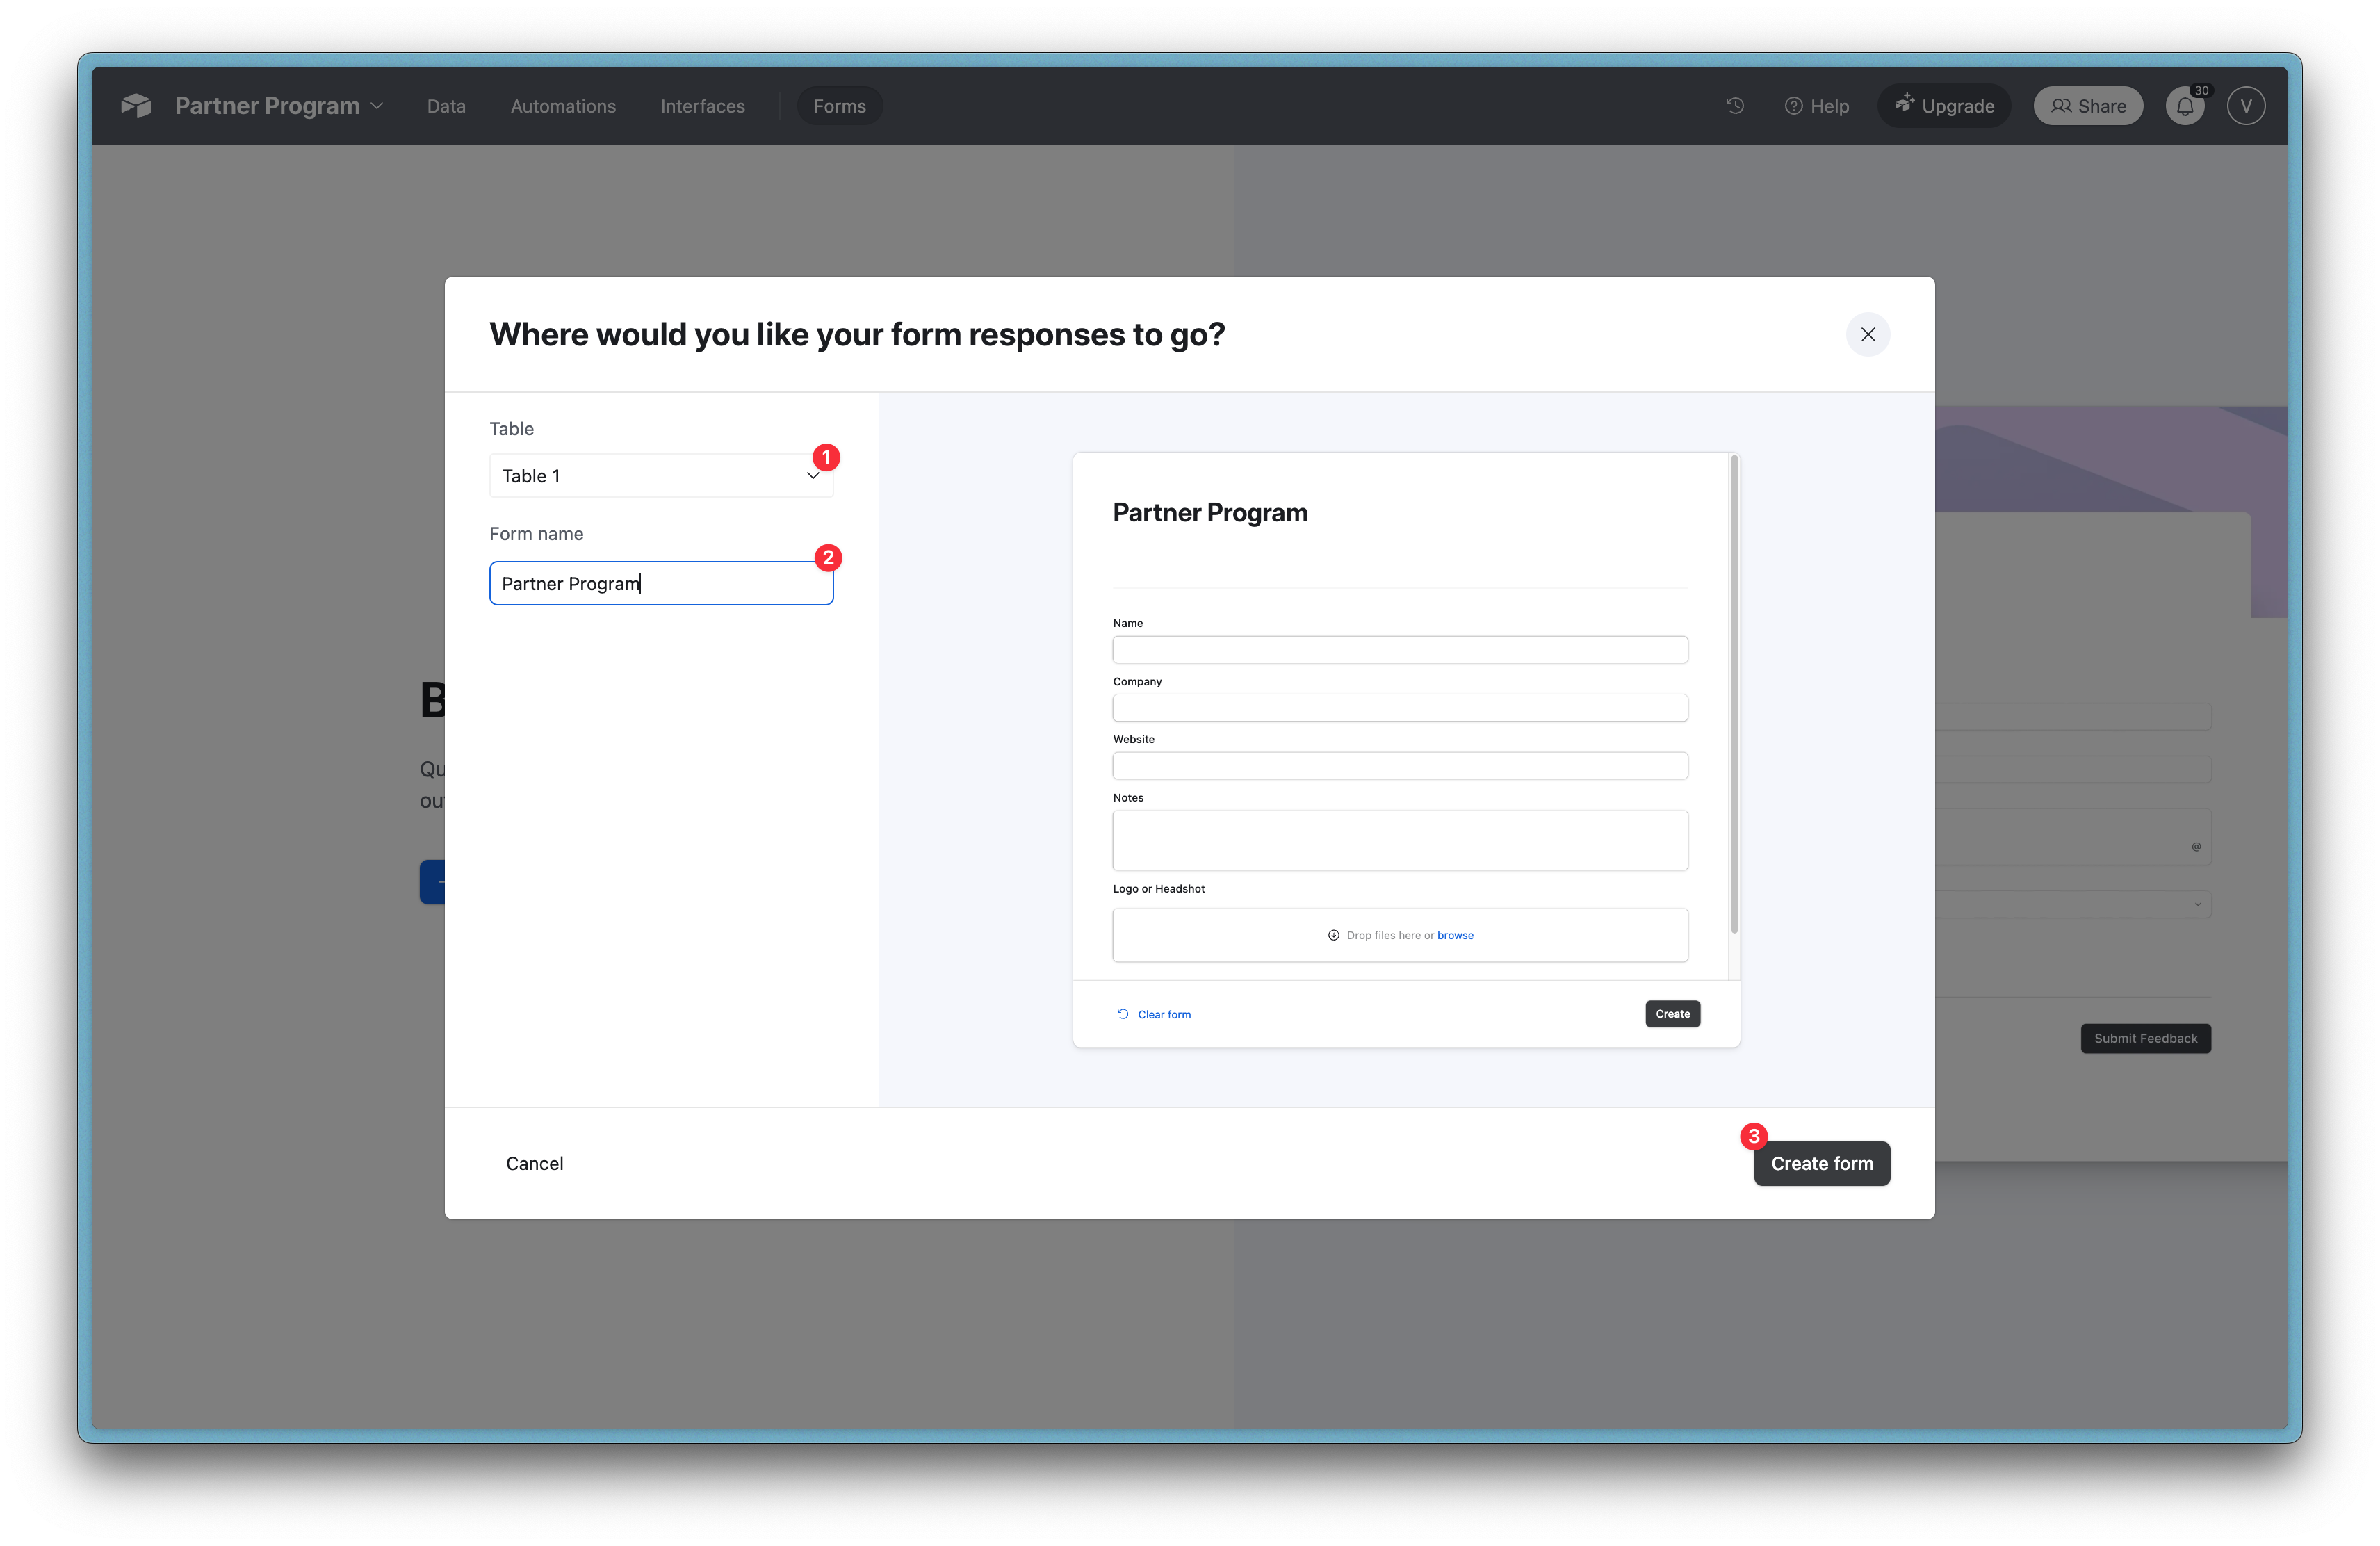
3. Choose where you want your form responses to go
You can choose where you want your form responses to go, either in an existing table in your base or a new table in the base.
If you’re building a form within an existing table, the form will automatically include the table’s fields, such as name, date, or other predefined fields. Each submission will be recorded as a new entry, with all responses neatly organized in the corresponding columns.
I want my form responses to go in a new table which I’ve called Table 1.
4. Edit the fields
Edit the fields with the data you want to collect. Choose your field type from the options in the dropdown menu. This could be names, email addresses etc. For my Partner Program I want to collect names, company name, website URLs and logos or headshots.
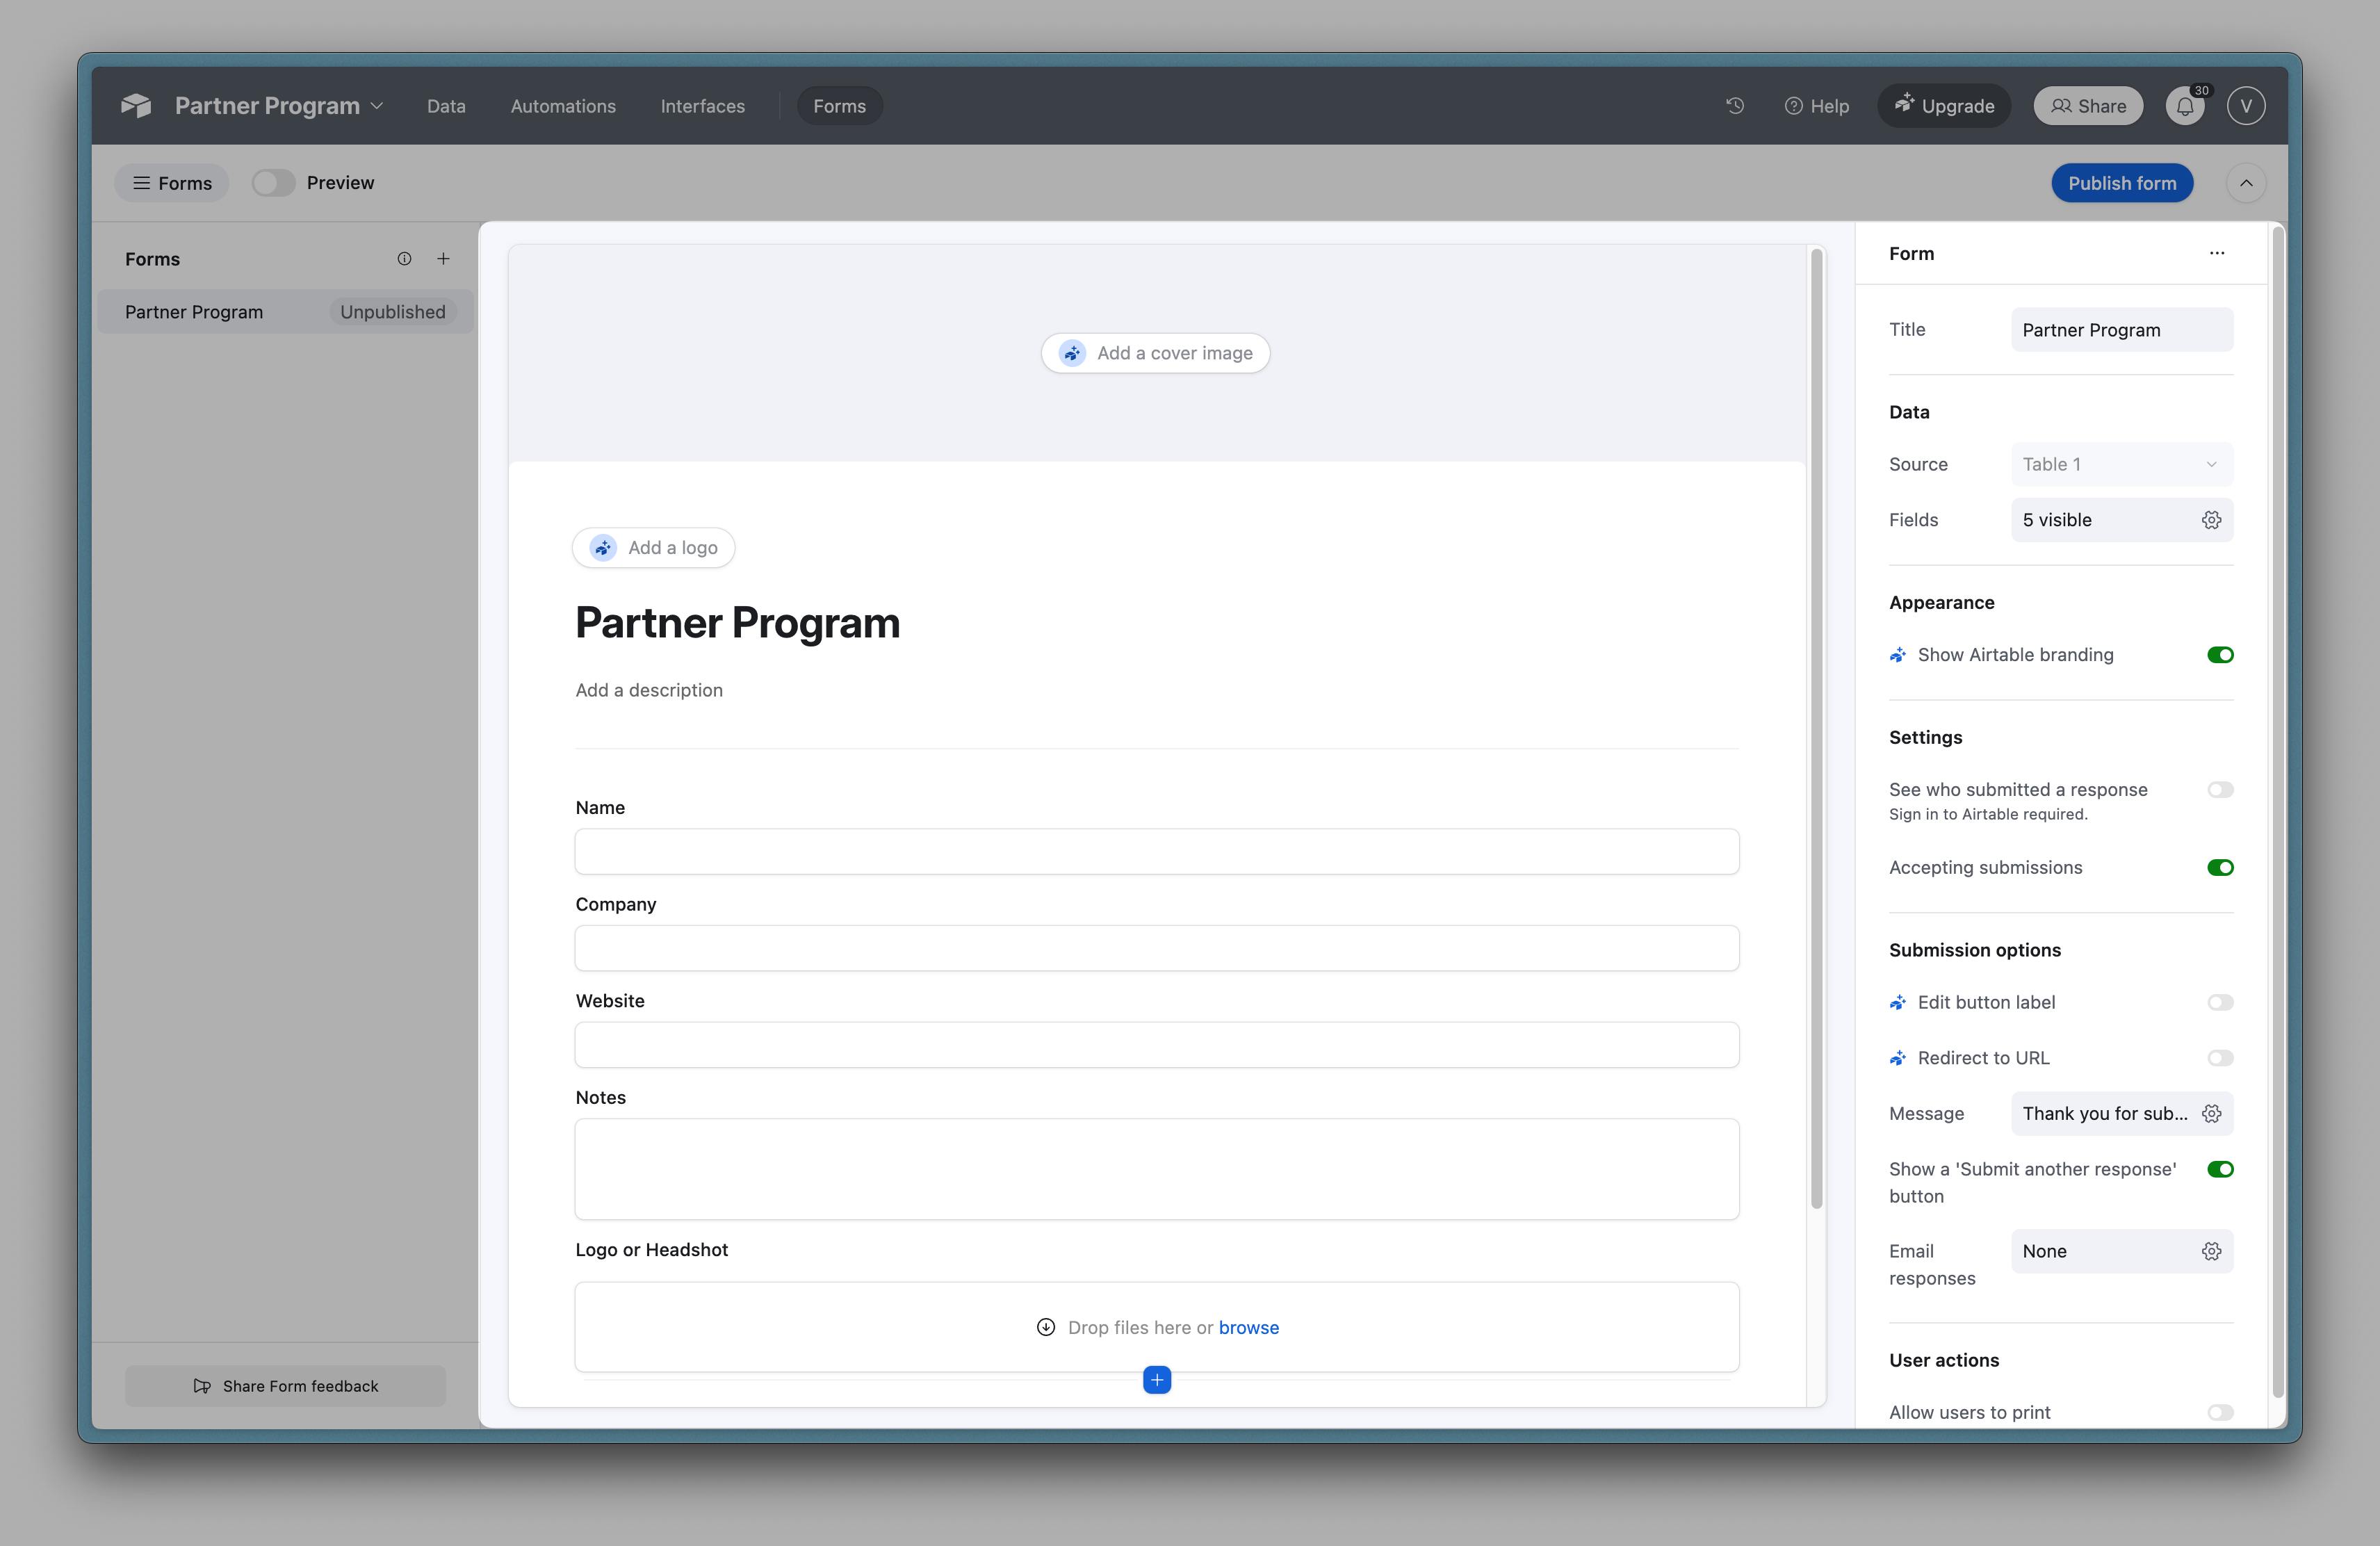
You can also customize the form to incorporate your branding and set up a submission response message.
4. Publish your form
.png)
5. Share your form
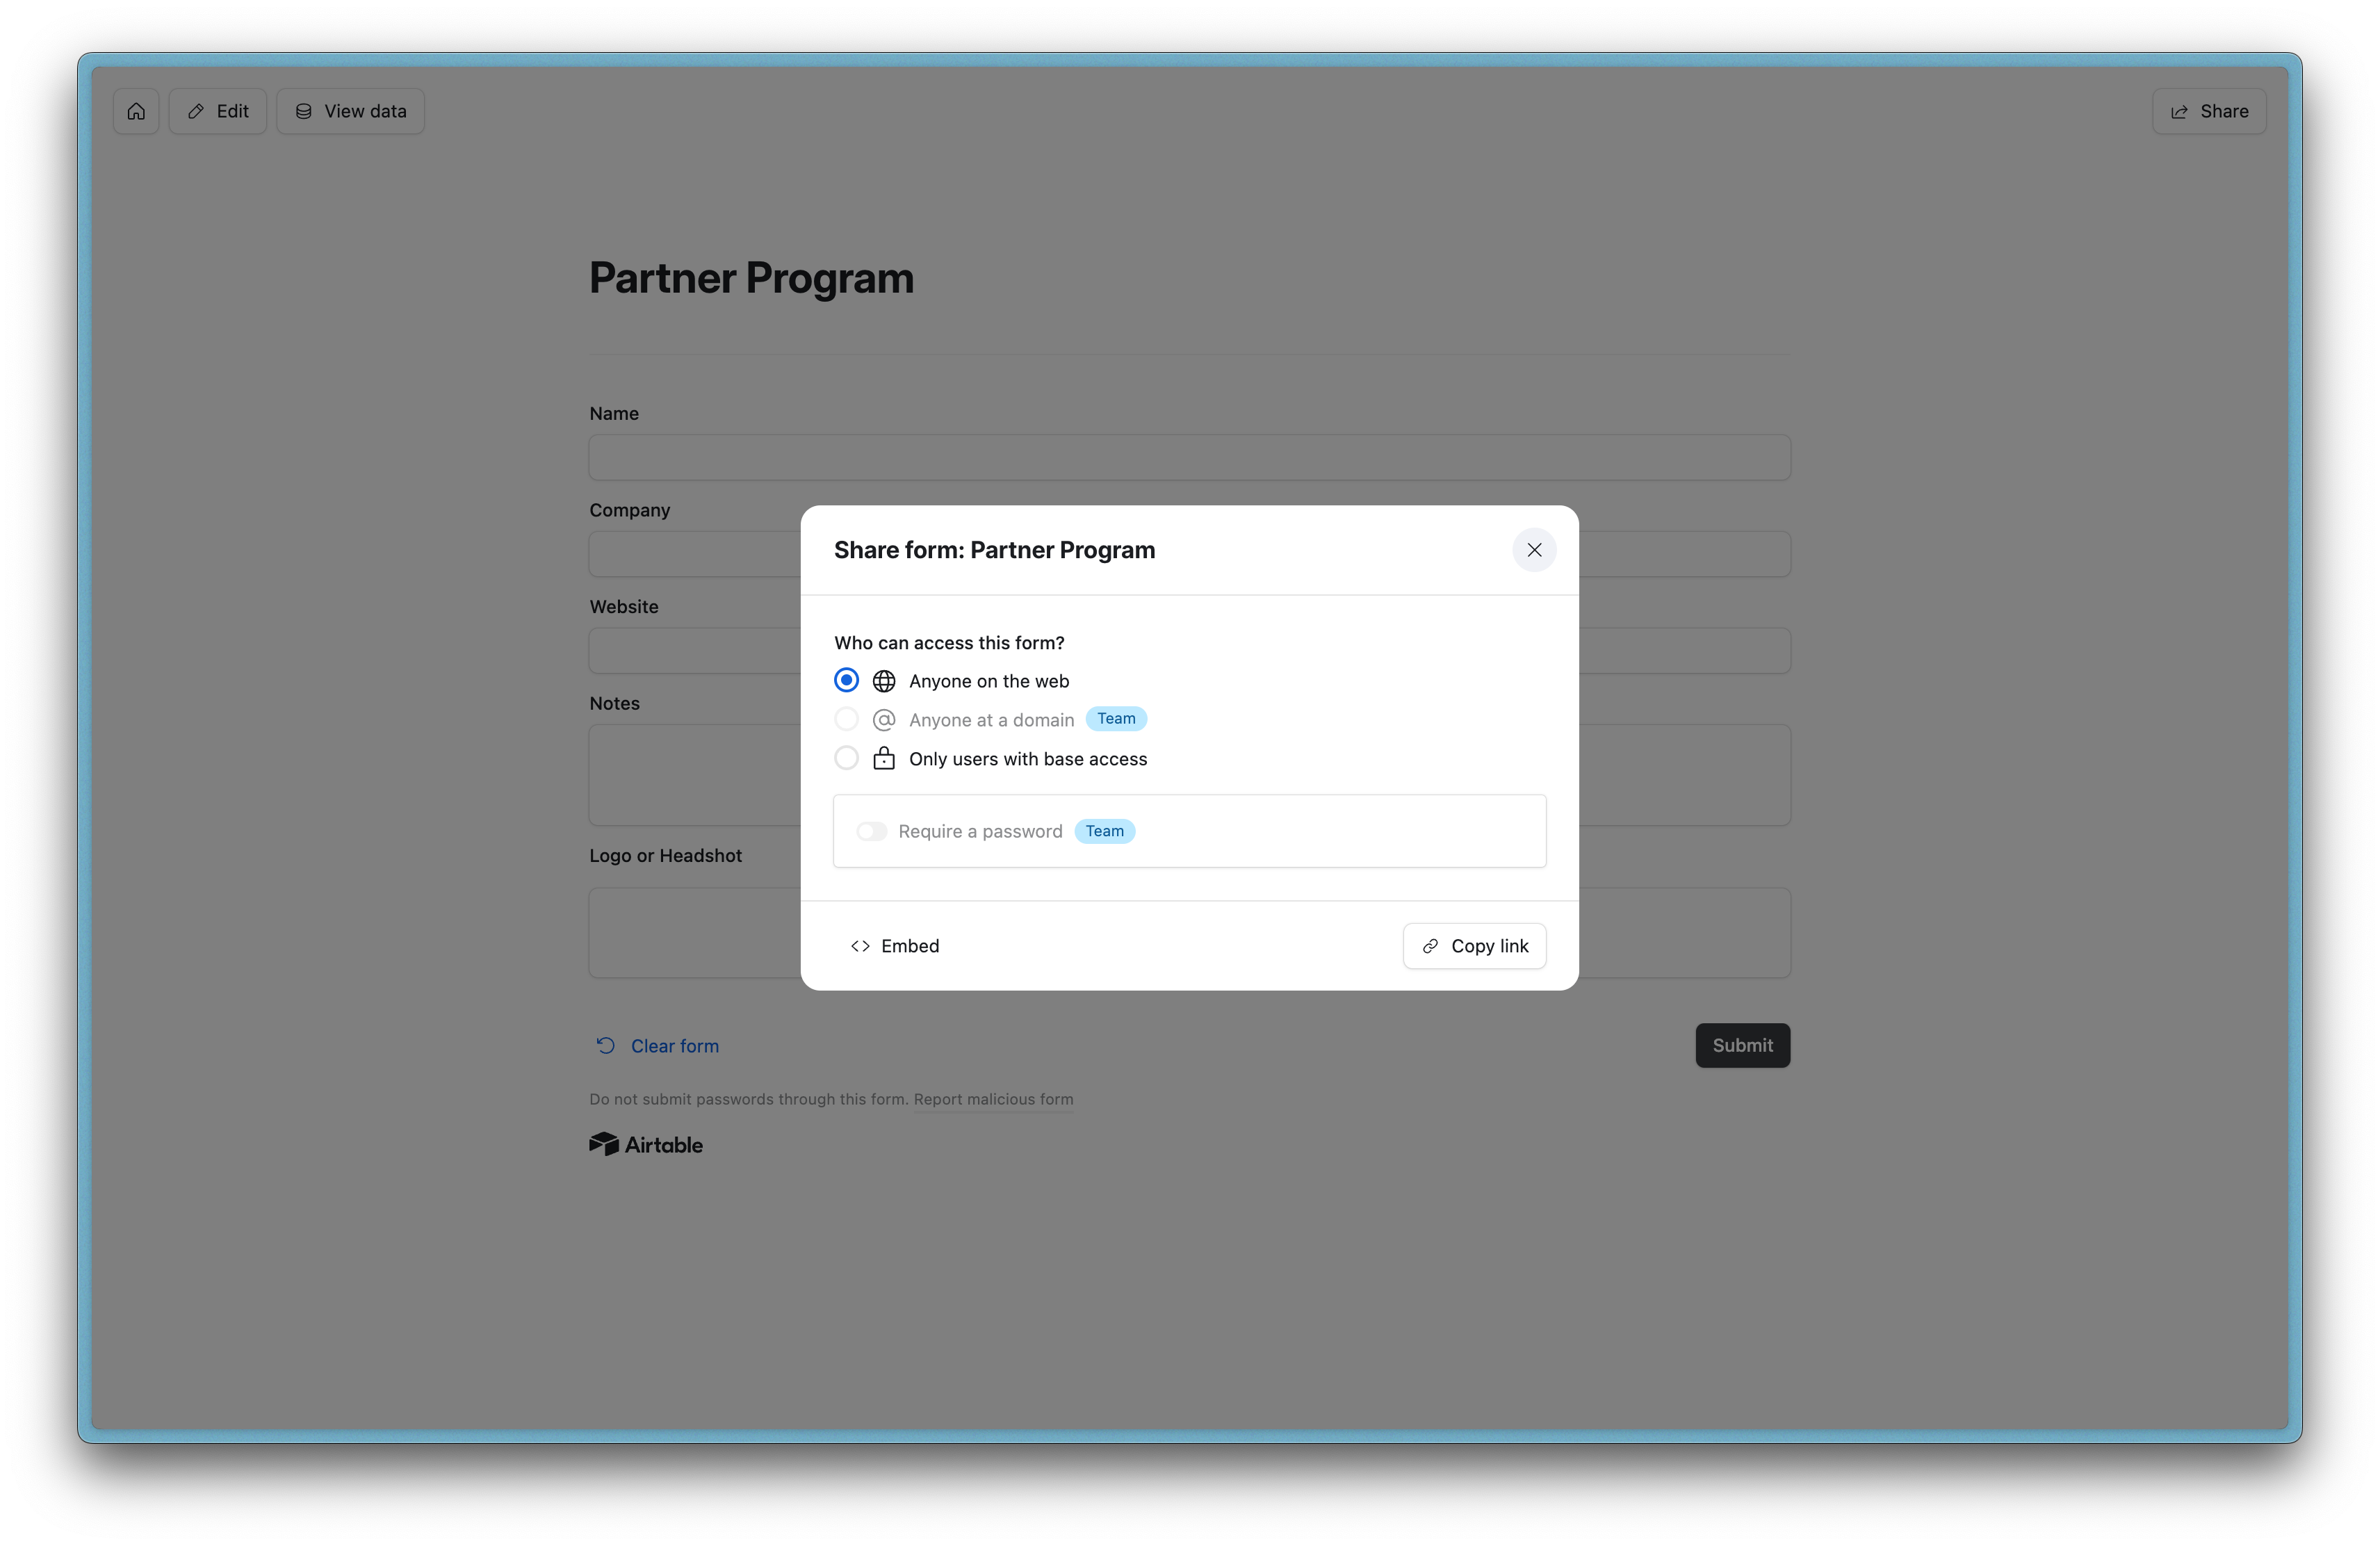
If everything looks good, click the ‘Share form’ button to adjust your sharing settings and publish your form.
You can embed the form on a website or share it via a private link. No matter how you distribute it, each submission will automatically populate your base, keeping your data well-organized.
Why use Airtable forms?
Airtable forms are easy to set up and manage, allowing you to collect and organize data without any coding. With a user-friendly interface and great customization options, Airtable forms let you tailor fields and sends responses directly into your base.
What forms can I create with Airtable?
The possibilities are endless, but here are some examples of forms you can create:
- Freelance applications: Collect and manage applications from potential freelancers, with an option to upload their portfolio and availability.
- Expense submissions: Streamline expense tracking by allowing team members to submit receipts and reimbursement requests in one place.
- Event registration: Simplify event planning by capturing attendee details, preferences, and confirmations.
- Content submission: If you run a newsletter or a blog, organize and review content contributions.
- UX research participant registration: Recruit participants for your user research panel by collecting user information availability, and consent.
Create forms and sync your data
That's it! Creating forms in Airtable is as simple as I promised. In just a few minutes, you can build a form that collects exactly the information you need, and it will be aorganized neatly in your Airtable base.
What I love about Airtable forms is how they eliminate the need to manually transfer data from one place to another. When someone submits your form, their response automatically appears in your table, no copying and pasting required.
Of course, if you're using Airtable alongside other tools (like Notion, Webflow, or your CRM), you might find yourself wishing that your form data could automatically appear in those places too. That's actually why we built Whalesync, to help your Airtable data flow seamlessly to your other tools and back again.
So next time you're collecting partner applications, event RSVPs, or content submissions through your Airtable form, consider how much time you could save by having that information automatically sync to the other tools your team uses.
Give forms in Airtable a try for your next data collection project. They're straightforward, practical, and might just make your workflow a whole lot smoother!
Subscribe for more
Stay up to date with the latest no-code data news, strategies, and insights sent straight to your inbox!


.jpeg)





.svg)


.svg)


