How to add AI summaries to all your blog posts

Step-by-step guide to adding AI summaries to all your blog posts.
Here’s how you can add an AI summary (like the one below) to all your blog posts in just a few minutes.
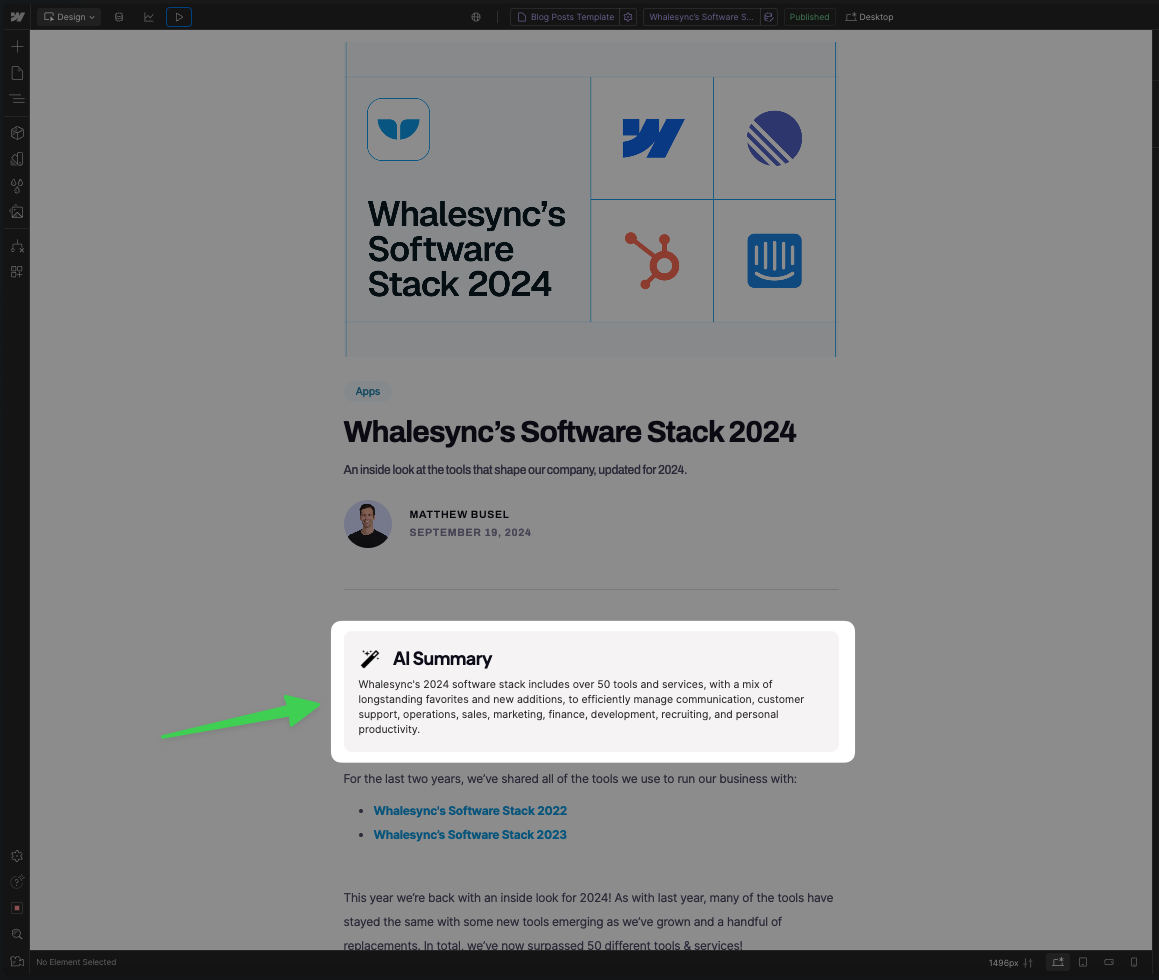
Summaries are a great way to hook readers and give them an idea of what they’re about to read. With AI and a few no-code tools, it’s now possible to add summaries to hundreds or even thousands of blog posts in a few minutes.
In this guide, we’ll go step-by-step on how you can add AI summaries to the top of each of your blog posts using Webflow, Airtable, and Whalesync.
TL;DR
- Create a CMS-powered text block in your Blog Posts template in Webflow
- Create a simple Airtable table with fields for Name, Blog Post, and AI Summary
- Sync your blog posts from Webflow into Airtable with Whalesync
- Run Airtable AI on each blog post to generate a summary
- Sync the AI summary into Webflow with Whalesync
Video Guide
Step-by-Step Guide
1) Prep Webflow
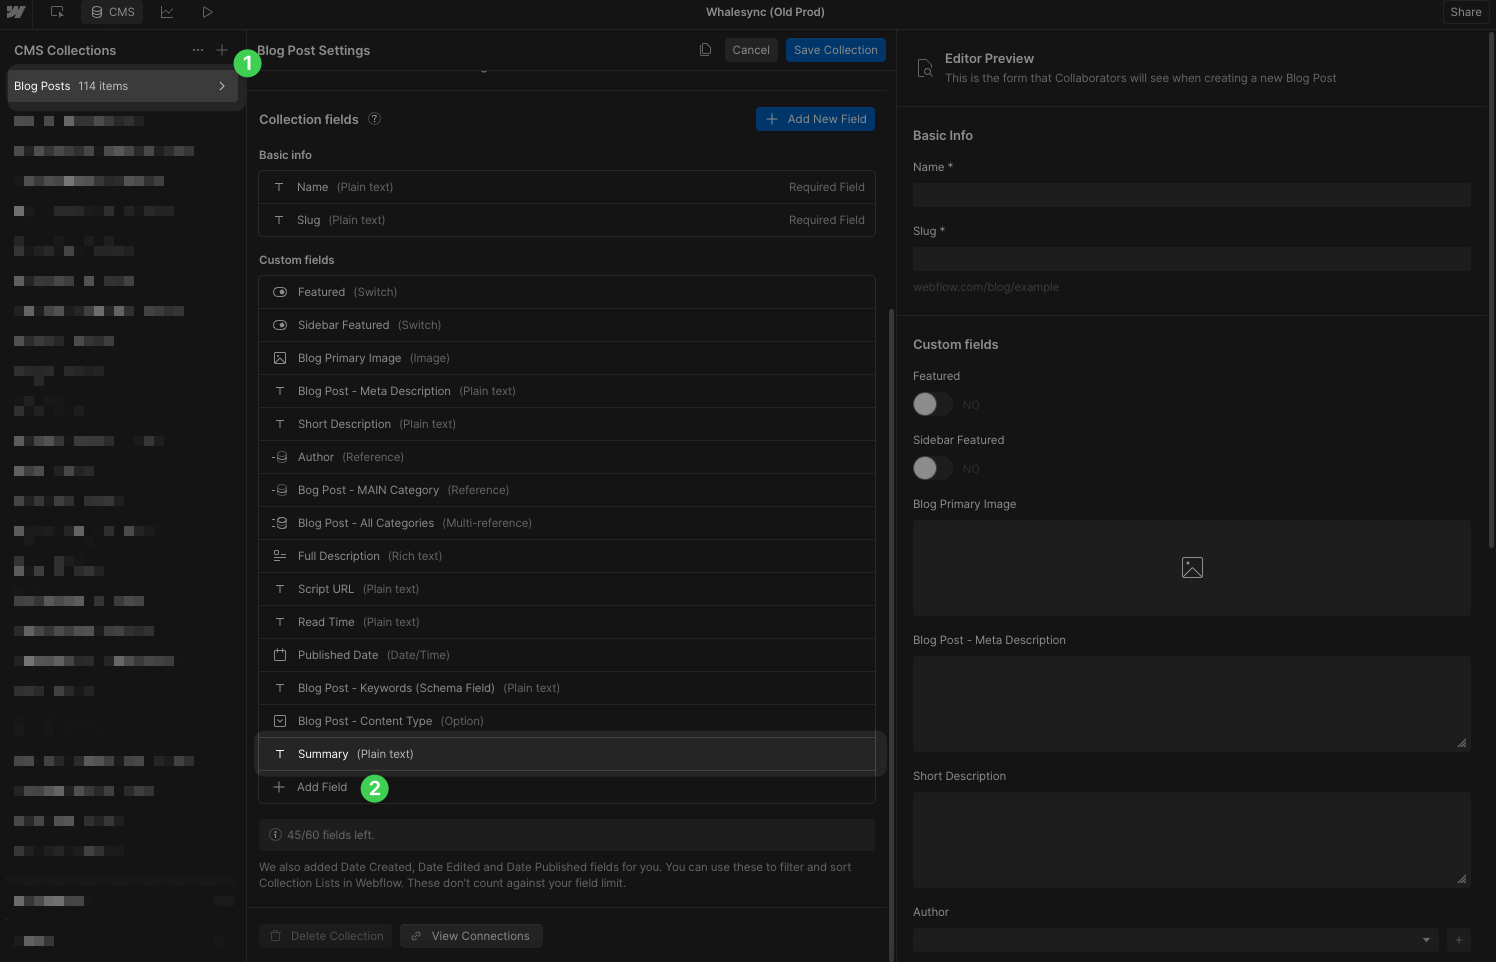
- Go to your Blog Posts CMS collection in Webflow and add a text field called “Summary”.
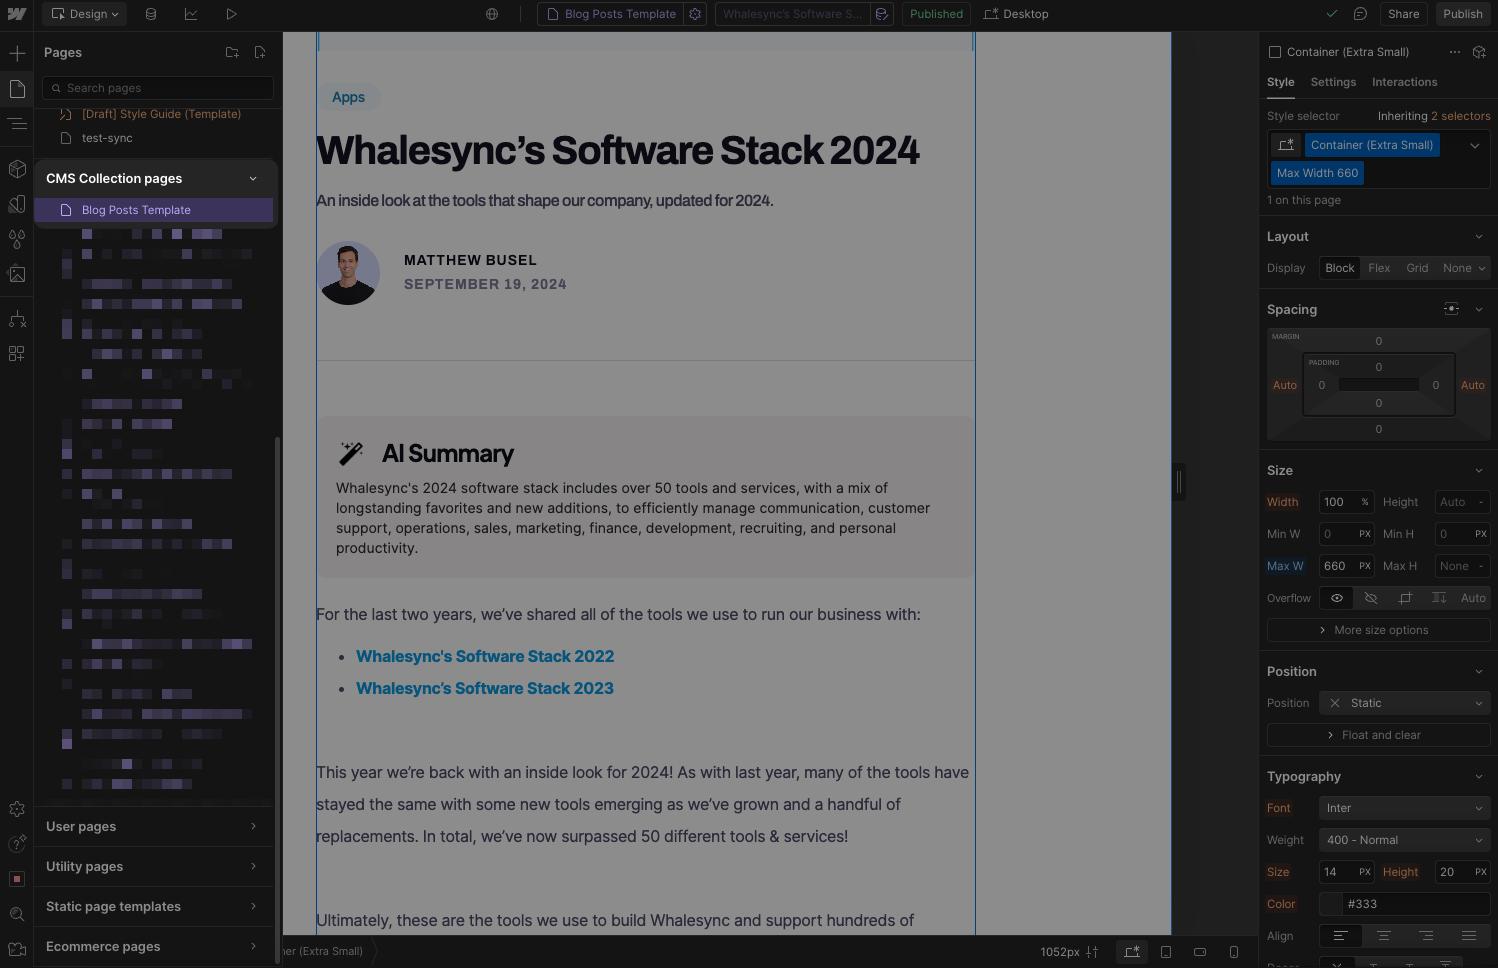
- Go to your blog post CMS page template in Webflow.
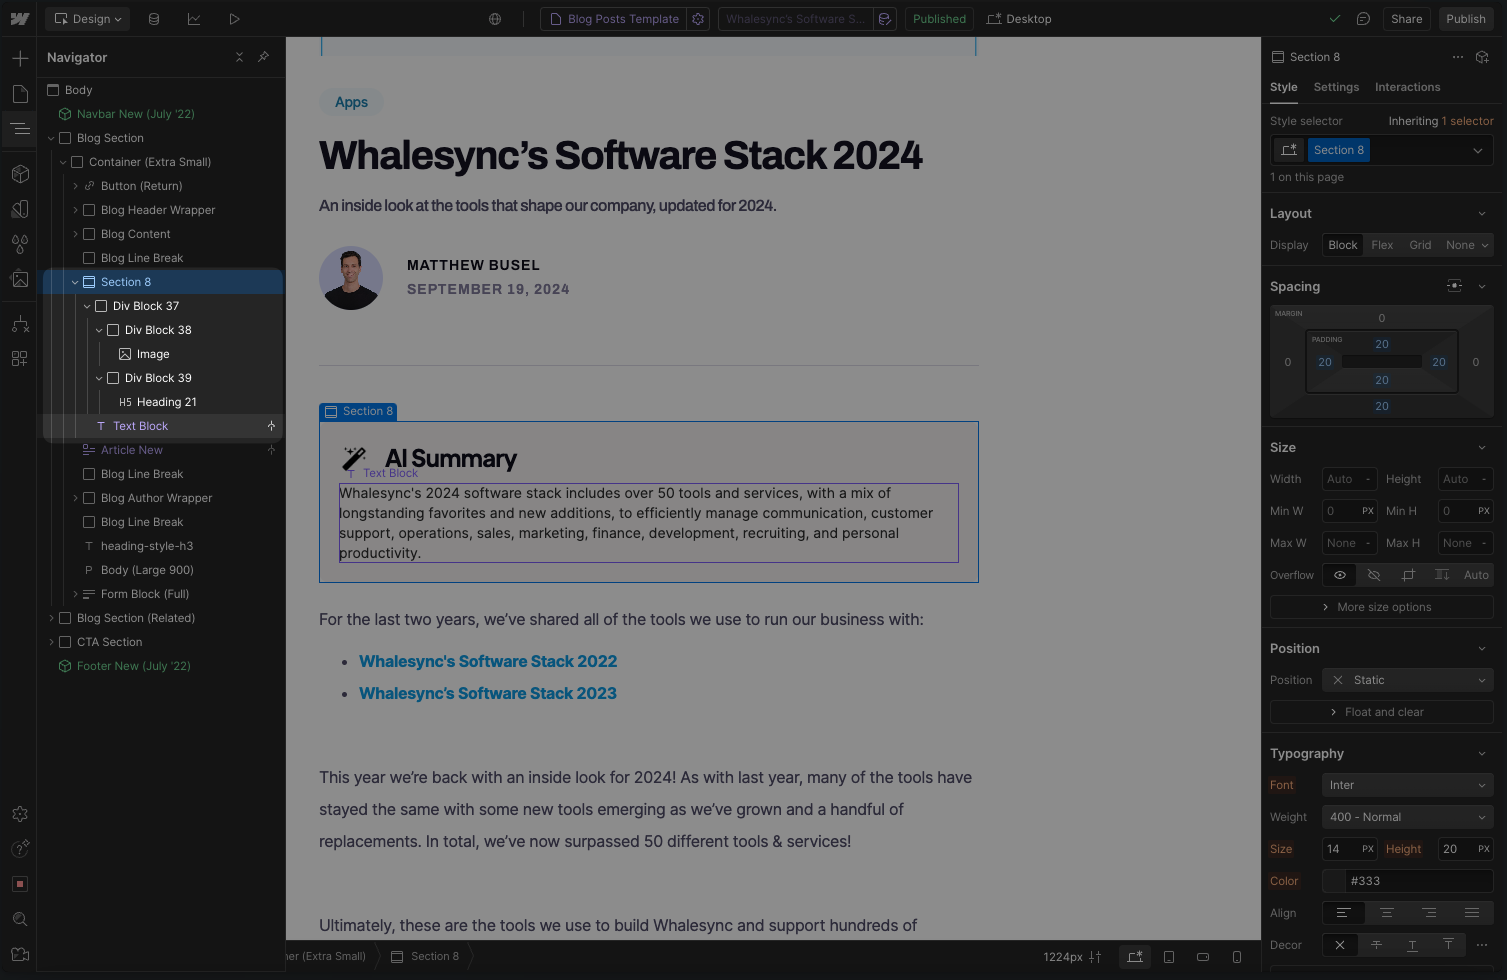
- Add a div block with a text block (where you can later add your AI summary).
- Click on the “settings” wheel for that text block → then “Text Block settings” → then choose the new “Summary” field you just created.
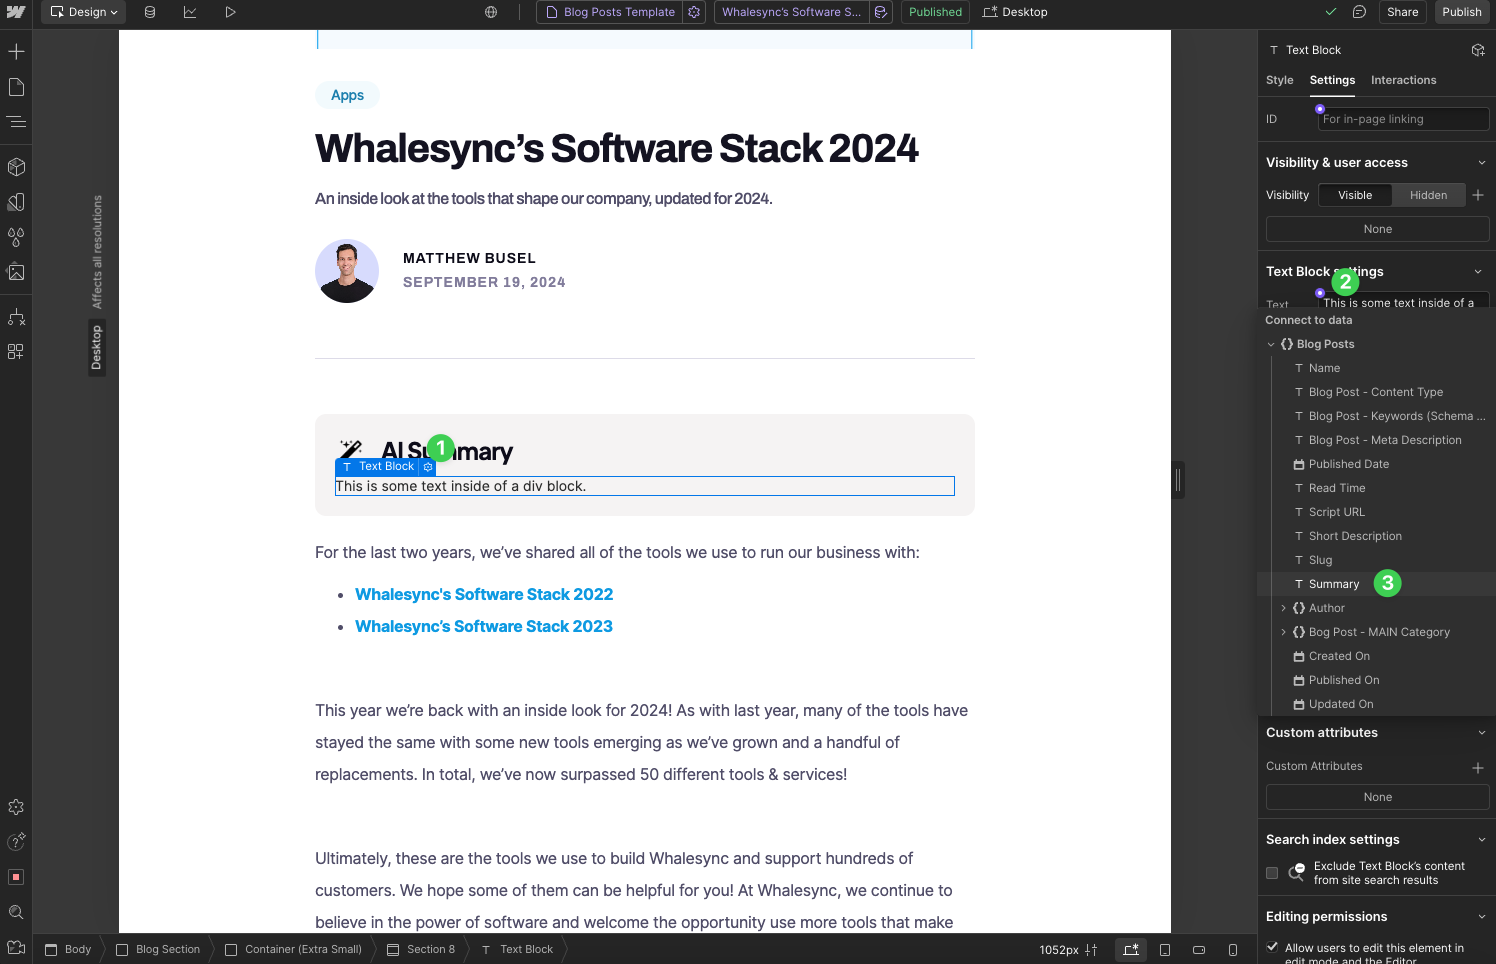
- Add a conditional visibility on the whole section to only show it if the “Summary” is set.
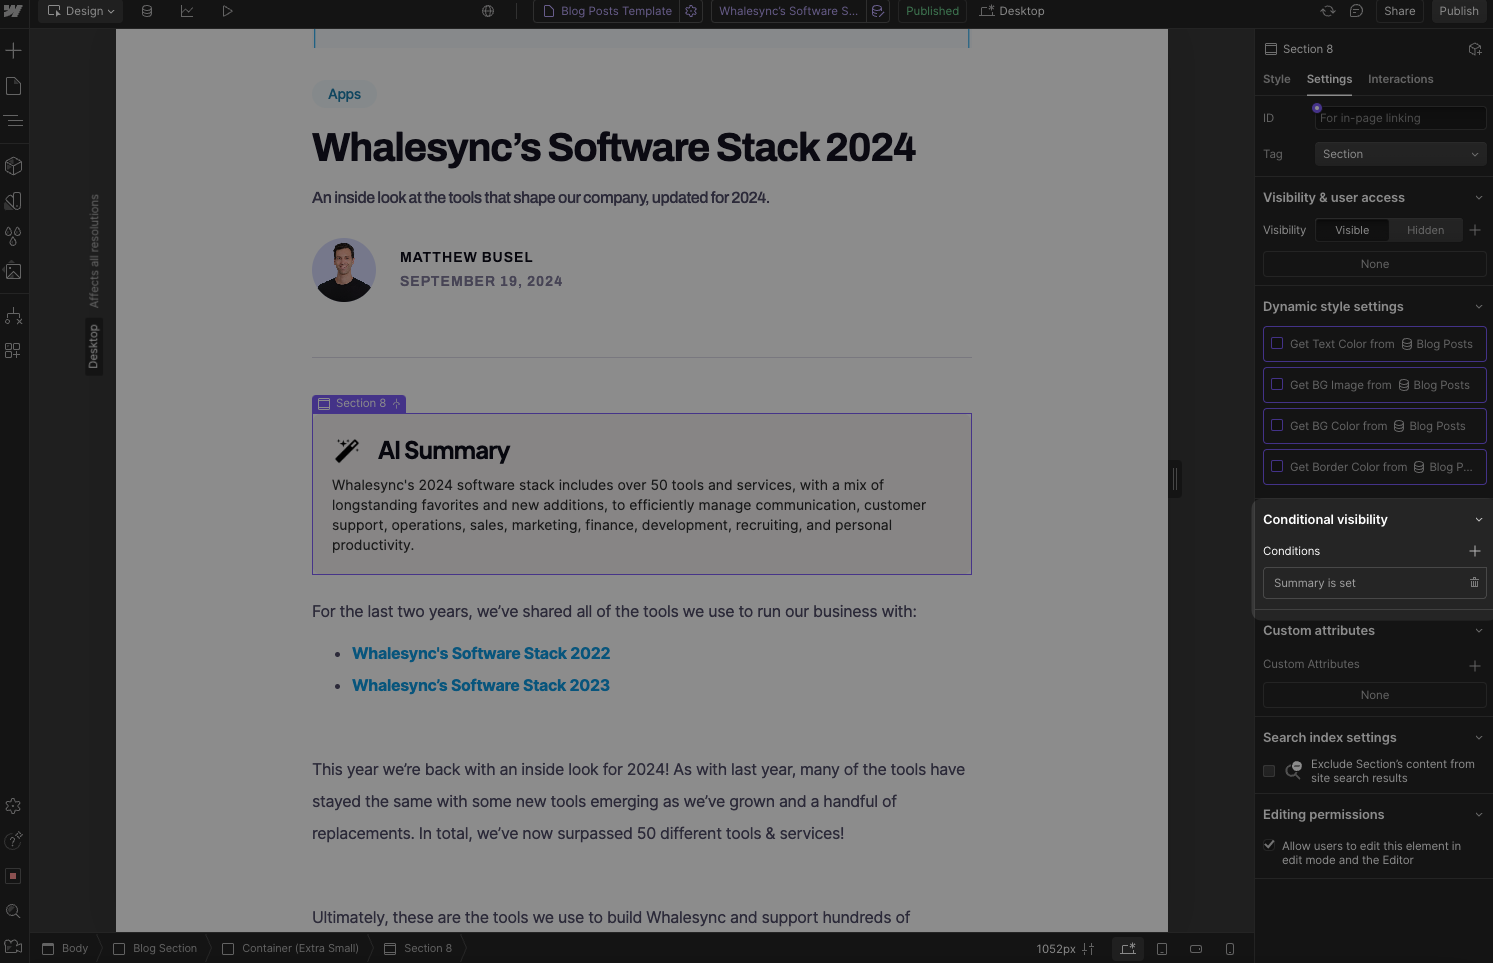
- This way the section won’t show on blog posts where we haven’t added an AI summary yet.
2) Prep Airtable
- Go to Airtable and create an Airtable base with a text field called “Name” and rich text field called “Blog Post”.
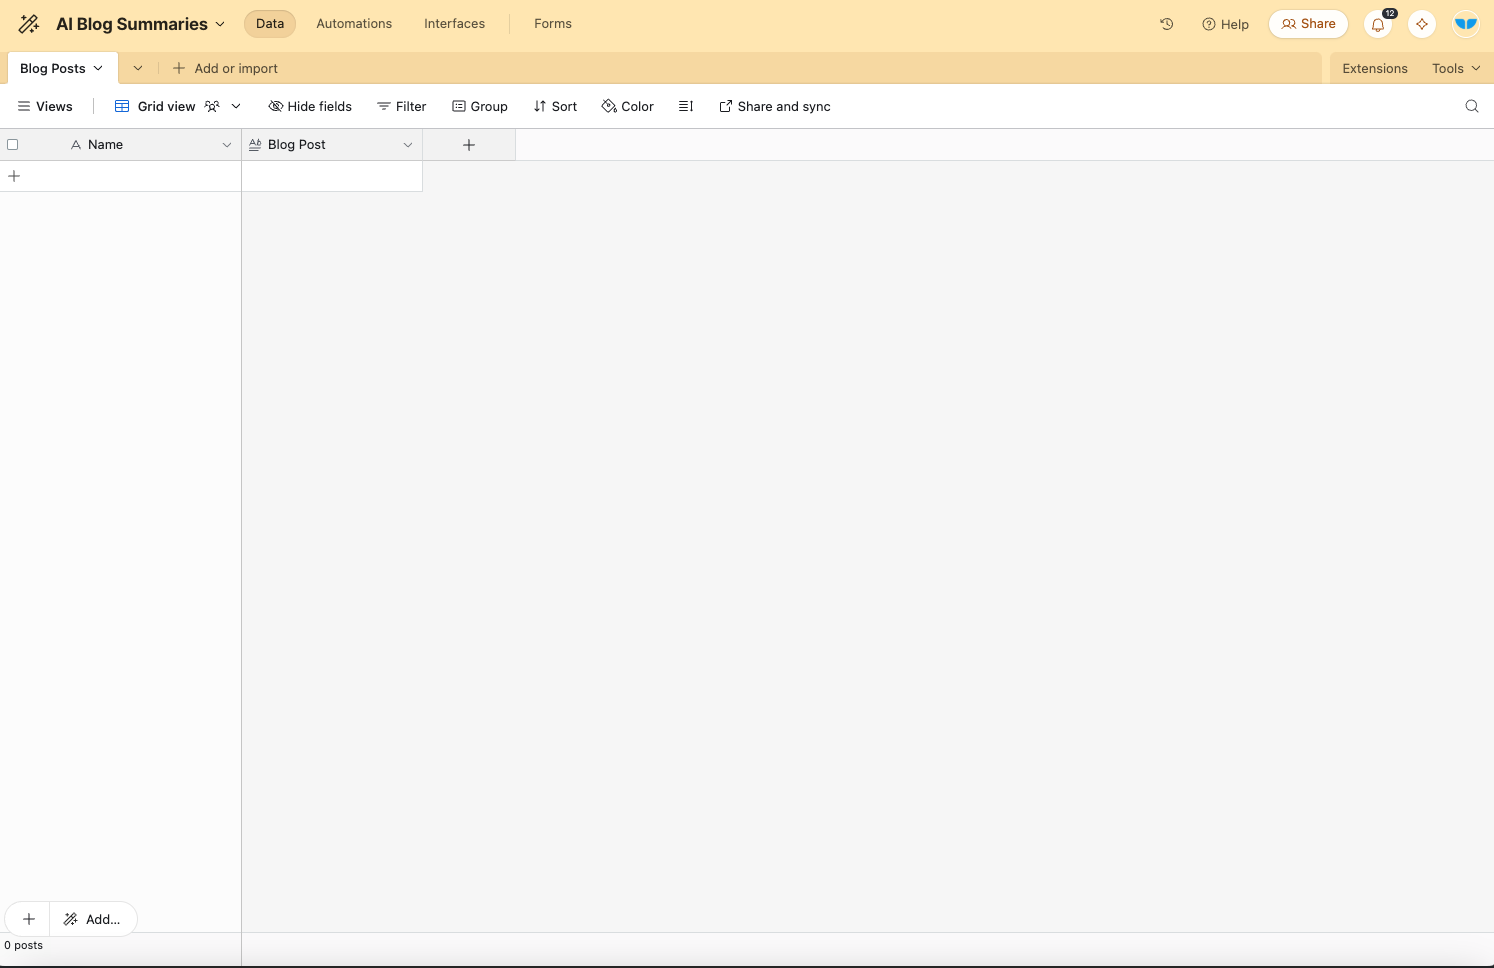
- *note - you must be on a paid Airtable plan to access Airtable AI.
- Add an Airtable AI field, then select “Generate Text” and “Start from Scratch”.
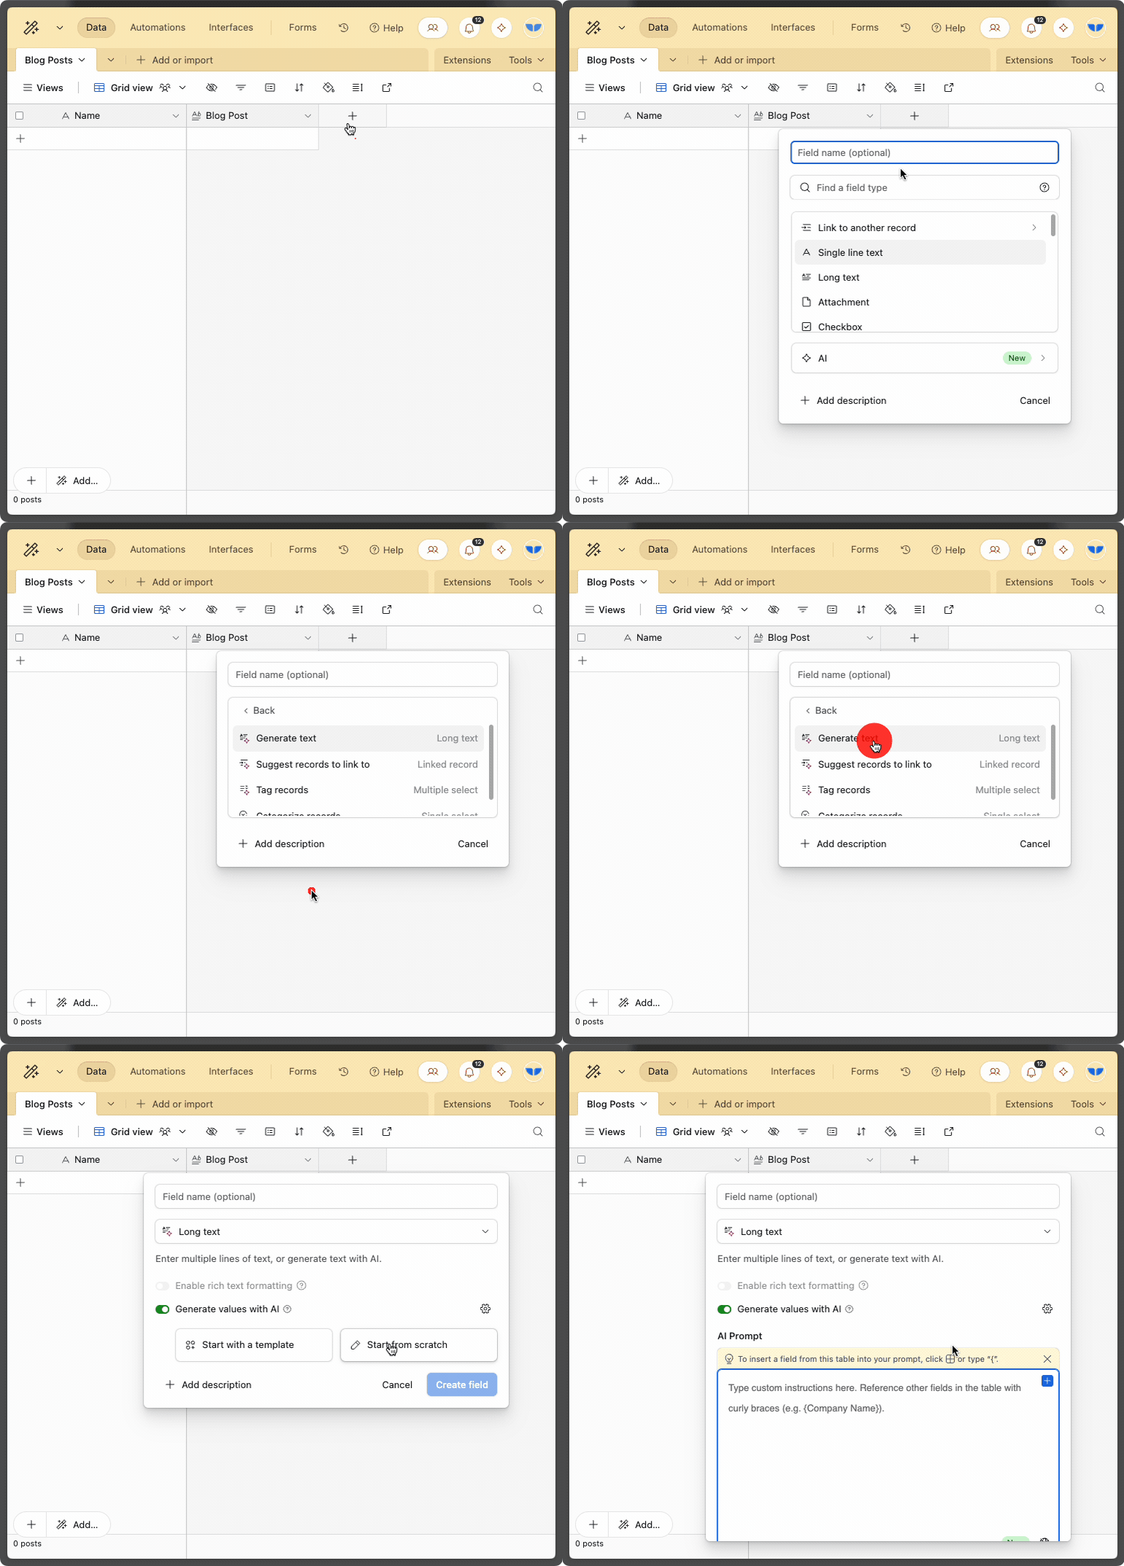
- Add your AI prompt (or equivalent).
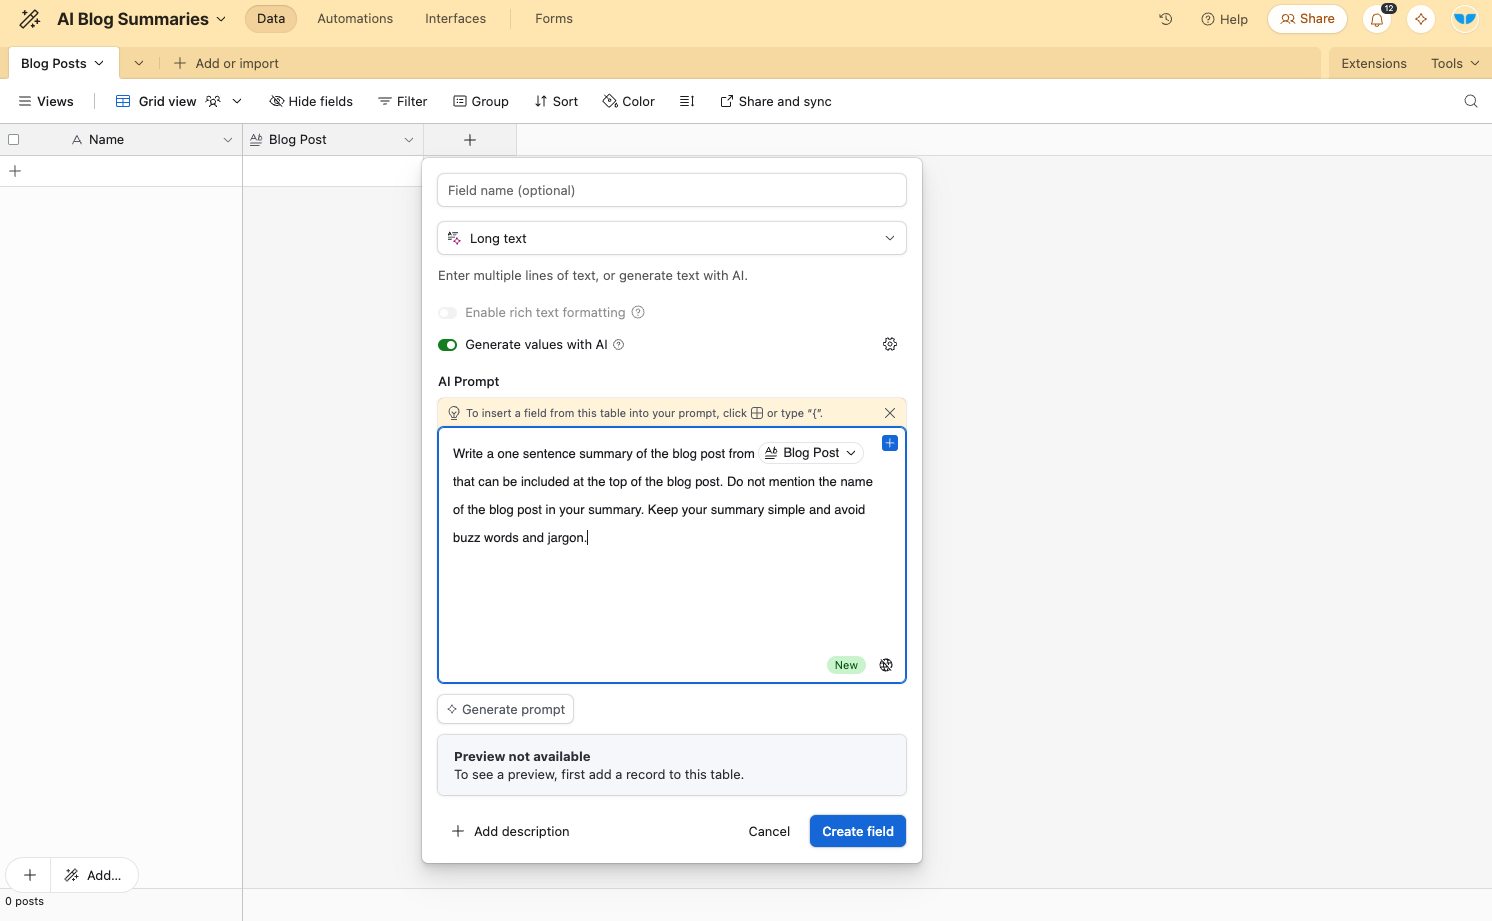
Here’s the AI prompt we used:
Write a one sentence summary of the blog post from that can be included at the top of the blog post. Do not mention the name of the blog post in your summary. Keep your summary simple and avoid buzz words and jargon.
3) Sync Webflow and Airtable
- Go to Whalesync and create a new Sync.
.png)
https://app.whalesync.com/ - Map the Blog Posts collection in Webflow with the Blog Posts collection in Airtable.
.png)
- Set the Sync Direction to be 1-way from (from Webflow to Airtable) for the “Name” and “Blog Post” fields.
.png)
- Click “Save and Exit”.
.png)
- Start an initial sync.
.png)
- Press “Activate” sync.
.png)
- Notice all the blog posts sync into Airtable (🤯).
.png)
4) Run the AI
Now that we have Webflow hooked up to Airtable, the final step is just running the AI.
- In Airtable, click “Generate” in the AI Summary field for one row.
.gif)
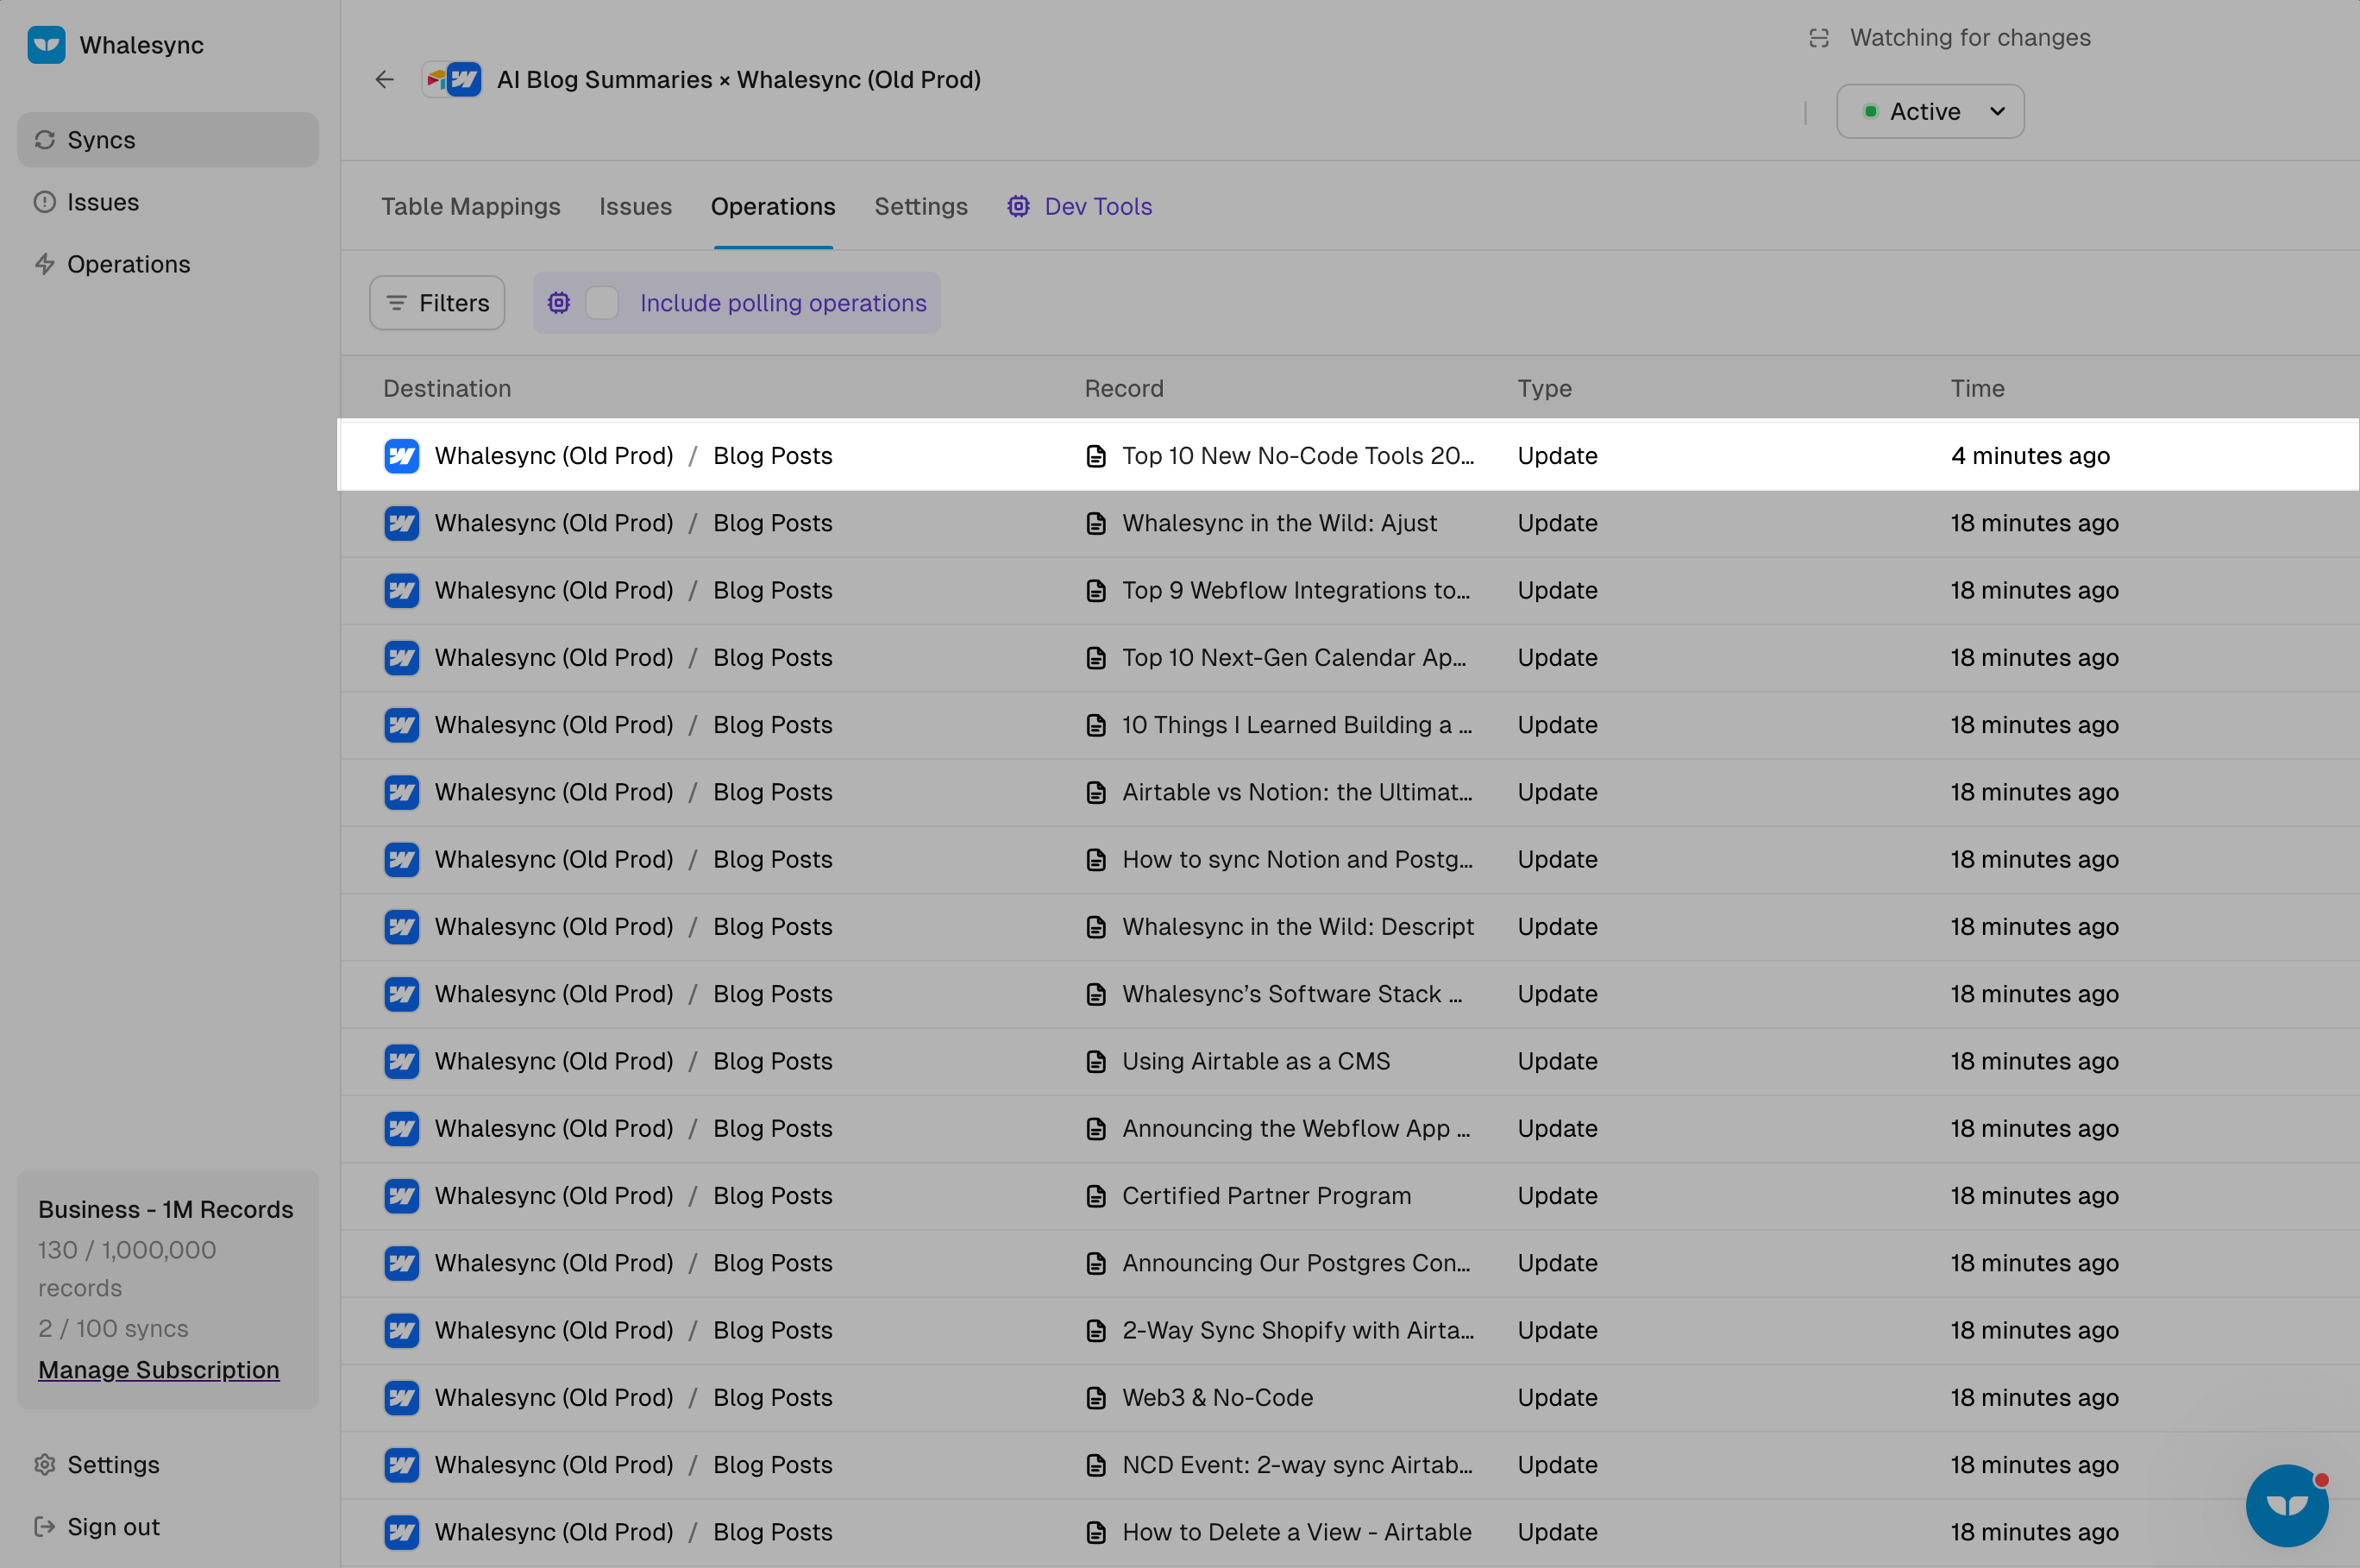
- Go to Whalesync, open the Operations tab, and confirm it synced to Webflow.
- Go to Webflow and refresh the page.
.png)
- Search for the page you just updated in the top.
.png)
- Notice the AI summary! 🎉🎉🎉
.png)
- Repeat for each blog post you want to add an AI summary or adjust the settings to run AI automatically.

Summary
That’s it! You now know how to add AI summaries to all your blog posts in just a few minutes.
Subscribe for more
Stay up to date with the latest no-code data news, strategies, and insights sent straight to your inbox!





.svg)


.svg)


